- Facebook50
- Pinterest355
- Subscribe
- Total405
Instant Pot Caramel Custard also known Creme Caramel is the easiest, tastiest, less complicated dessert you'll ever make. The Pressure Cooker Caramel Custard is melt-in-the-mouth soft, delicate & sweet with a good punch of liquid caramel.
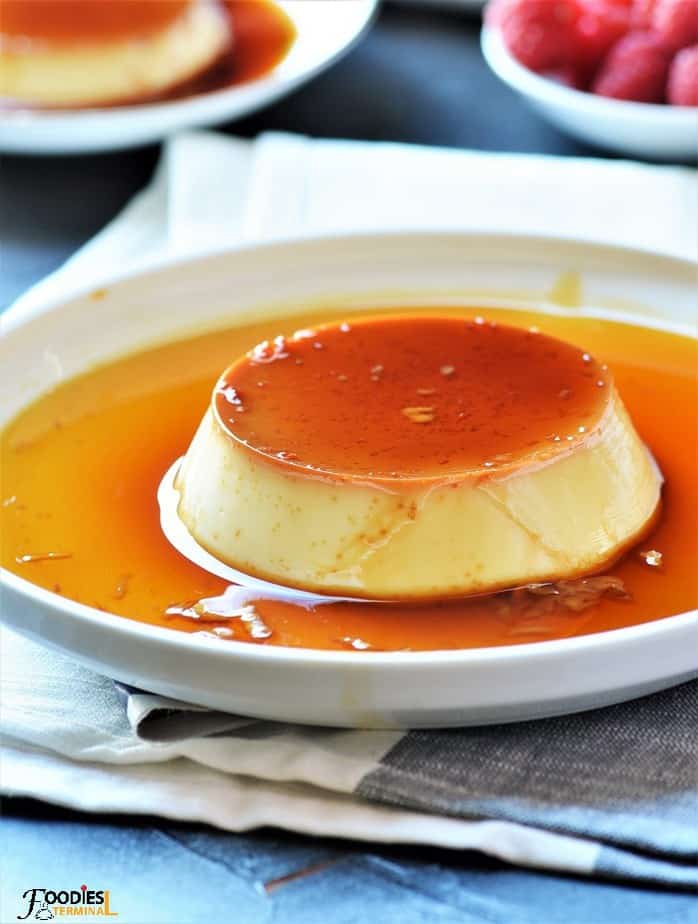
Caramel Custard in Pressure Cooker
You can make this caramel custard recipe in ramekins or any oven safe baking pots or containers. However, avoid push pans or spring-form pans. The caramel tends to leak all over. Oven Proof Pyrex bowls are also a good option.
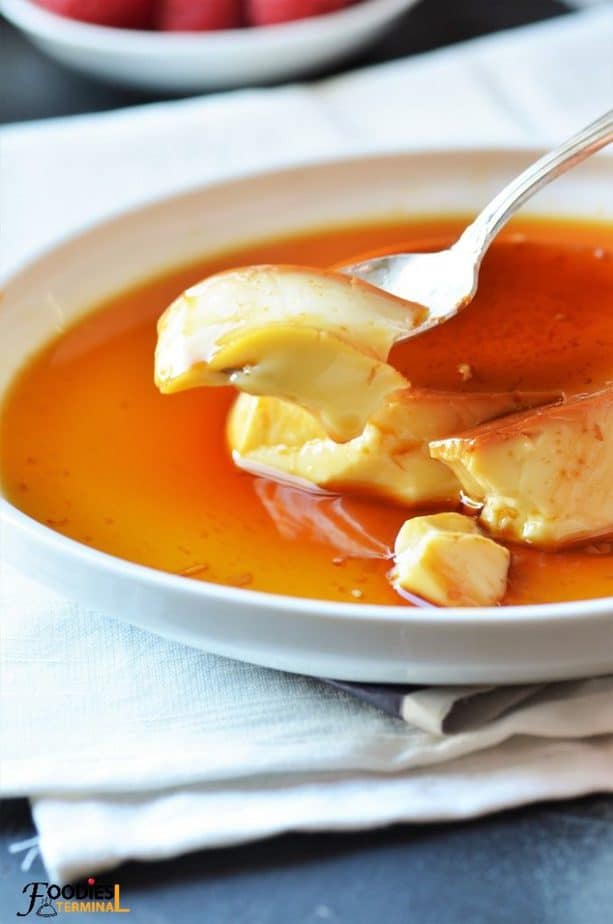
What is Caramel Custard?
Caramel Custard is a delicious light and delicate pudding like dessert that's made with only 3 ingredients - Milk, egg and sugar. It has a caramel sauce top and is not as dense as Flan. It's something in between a flan and a creme brulee 😀
Creme Caramel Ingredients
Find the Ingredients with actual measurements + Video at the bottom of the post
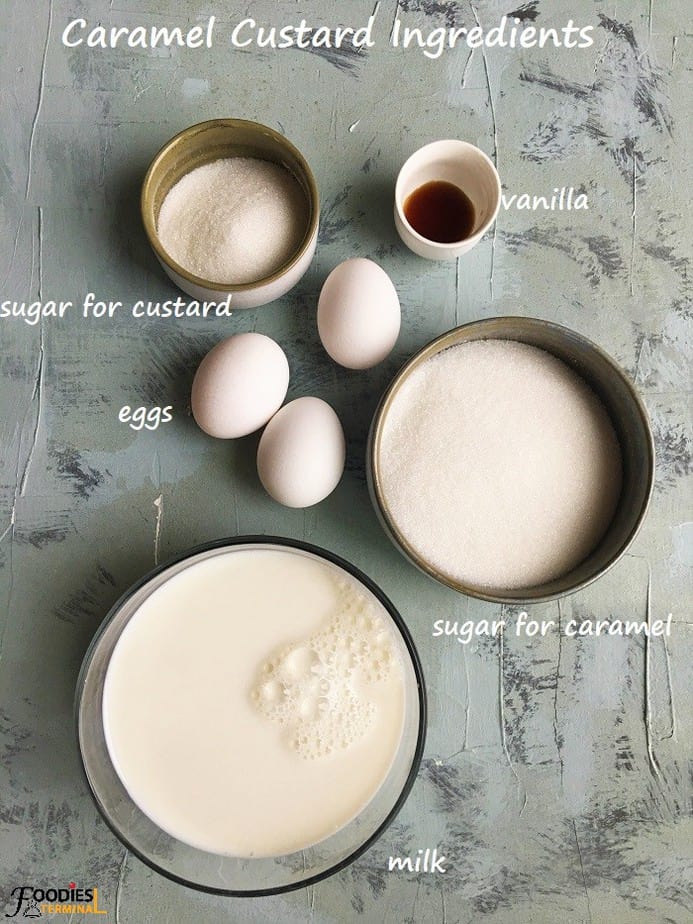
- Eggs: I used large. Room temperature eggs recommended.
- Sugar: Regular White Sugar recommended.
- Milk: Full Fat Whole milk recommended.
- Vanilla Extract: Totally optional. We don't use it on regular basis however, I used it for the recipe today.
Foodies Terminal Tips: Instant Pot Caramel Custard won't smell eggy if you choose to skip adding the Vanilla extract.
Tips & Tricks
- Whisk the Eggs First: Whisking the eggs in a separate bowl before adding them to the milk will save you tons of effort. You won't struggle to mix in the tough thread like transparent egg albumin with the milk. Those transparent streaks of albumin mix evenly and very well when you whisk the eggs separately.
- Mix the sugar very well with the milk: The sugar must completely incorporate into the milk.
- Prepare a good caramel: Stir the sugar frequently with little water and wait for the right caramelized color. The perfect caramel taste of the Caramel Custard depends a lot on how well you made the caramel. A rich caramel is always darker in color and smells so good.
- Allow the caramel to solidify in the base of the ramekins: The caramel sets quickly. When it solidifies pour the custard mixture into the ramekins.
- Cover the ramekins or flan pan & steam: Wrap the ramekins with aluminum foil. This will prevent the condensation water from accumulating on top of the flan.
- Chill the caramel custard: This will perfectly set the Flan and make it so good.
- Do not Over Cook the Steamed caramel flan: The flan will crack with longer cooking time.
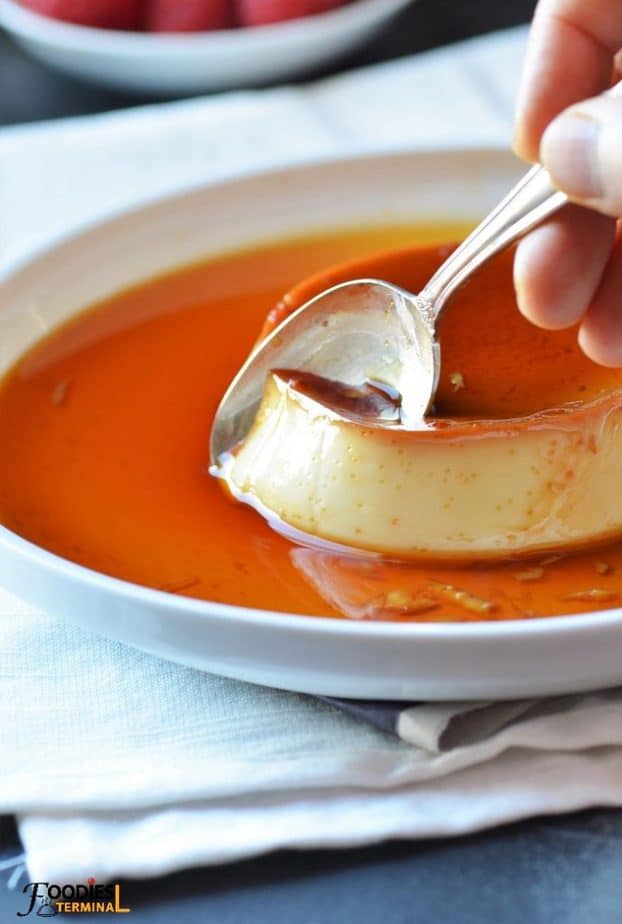
Pro Tip: The Caramel is very HOT & can easily burn you badly if not handles properly. DO NOT dip a finger to taste hot caramel or lick it off from a spoon.
How to serve caramel custard?
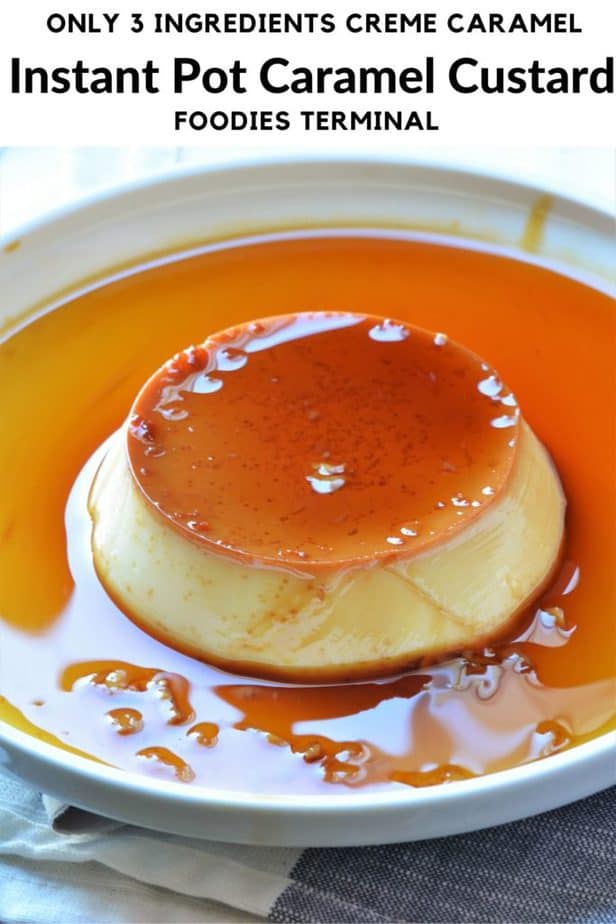
Serve directly in the ramekins or just slide the custard on a plate. Place a clean plate face down on top of the ramekin, hold the plate and the ramekin tightly with the help of both your hands and flip to invert the ramekin on the plate. The caramel custard will easily slide out and be upside down with a blanket of delicious caramel sauce as you see in the pics.
Method
Find the detailed step by step recipe along with measurements + Video at the bottom of the post.
Step #1 Prepare the Caramel sauce on the Stove Top
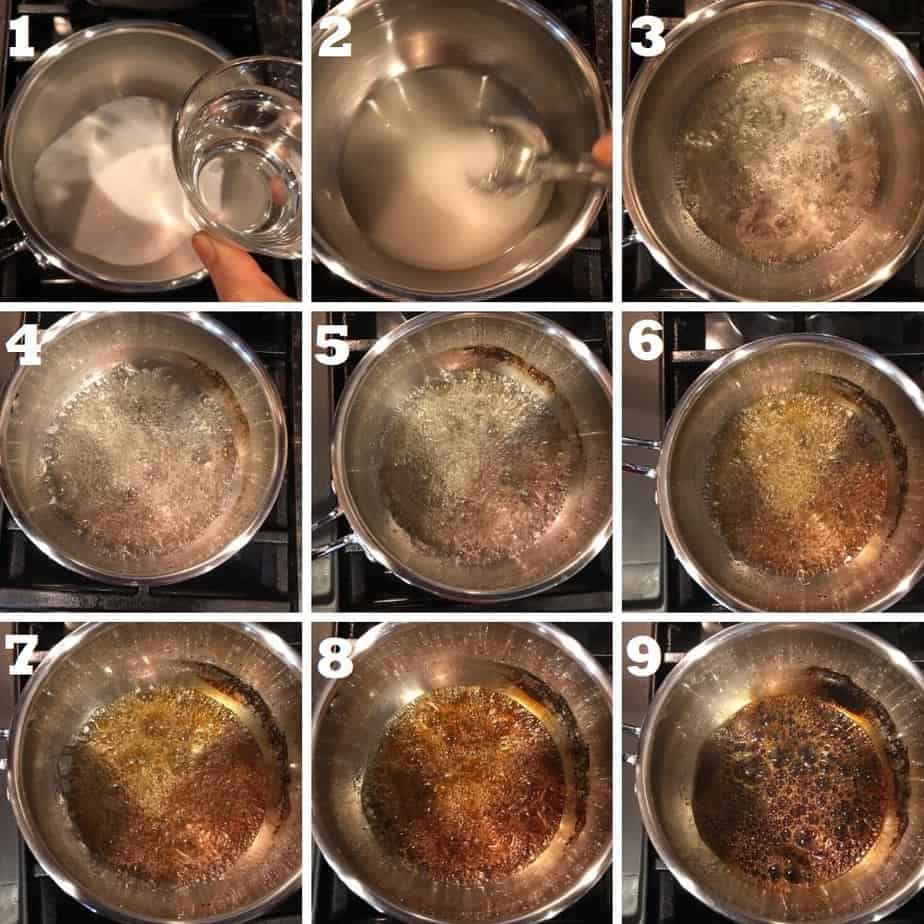
I always love to begin the recipe with the Caramel sauce because by the time the caramel sauce sets in the ramekins I make the custard which involves no cooking, just mixing.
Prepare the custard over medium heat. It takes some time and needs some patience.
Stir but not too much, it'll prevent the syrup from burning.
Never leave it unattended. It burns with a blink of an eye, believe me!
The recipe is very simple. It only requires water and normal white sugar.
You have to heat them up in a saucepan until the sugar completely dissolves.
The sugar syrup will slowly simmer, change it's color and caramelize and also thicken.
You may increase the heat to medium high to hasten up the process of melting the sugar. When it comes to a rolling boil reduce the heat to medium.
Pro Tip: The Sugar Syrup will change it's color from peanut butter to bourbon to dark amber and thicken in consistency. When the syrup will reach the dark amber color stage, you need to immediately turn off the heat. The caramel sauce is ready.
Be very careful, it's very very HOT.
Never try to taste it or touch the caramel sauce.
Step #2 Prep the Ramekins
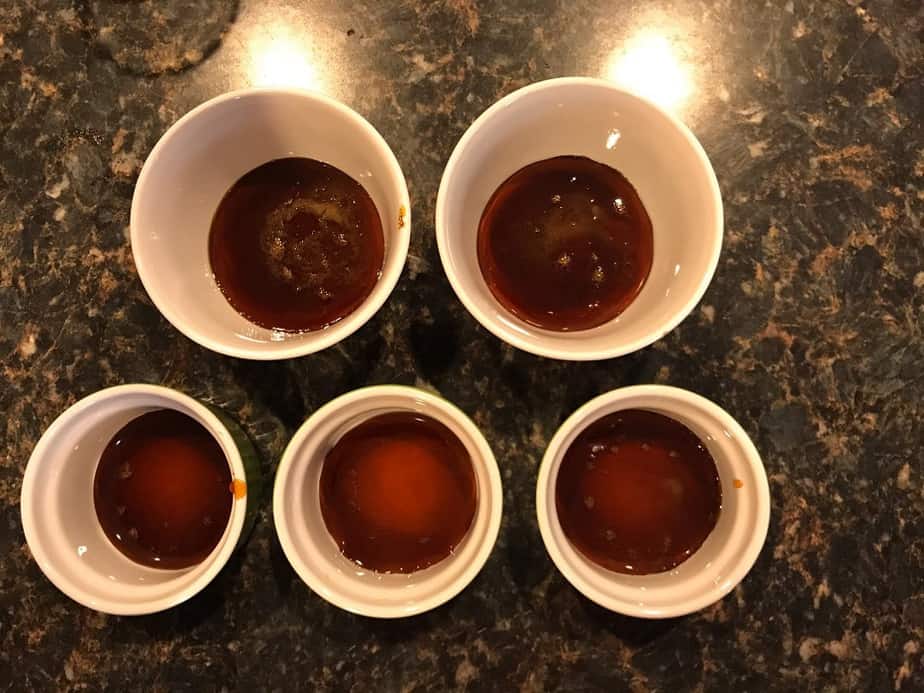
Once the Caramel sauce is done immediately pour the hot sauce into the ramekins.
Quickly rotate or shake the ramekins with the help of your hand to evenly distribute the caramel sauce on the base of the ramekins.
Do not touch the sauce ever. Allow the sauce to rest in the ramekins until it sets firmly.
In the meantime prepare the custard.
Step #3 Prepare the Custard
Beat the eggs
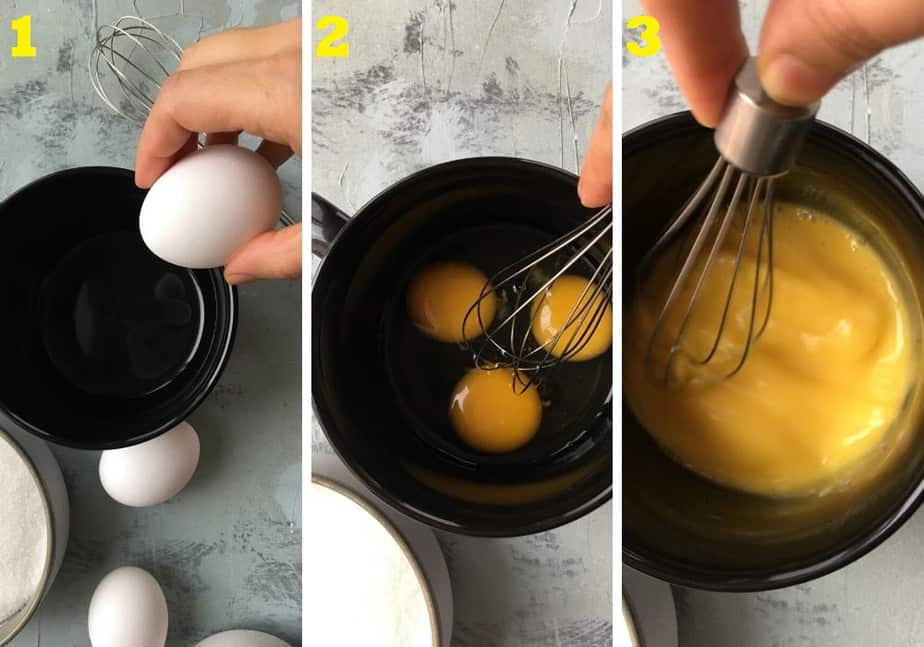
Best the eggs separately before adding them to the milk.
This is one little trick that will save you tons of effort.
Beating the eggs will help break the tough transparent thread like albumin of the egg and make the eggs smooth and lump free.
You can mix whisked eggs easily with the milk in a jiffy without any struggle whatsoever.
Advantage?
You don't have to struggle to mix in that tough thread like egg albumin in the milk and you don't need to strain the custard mixture as well once it's ready.
Mix all ingredients with Milk
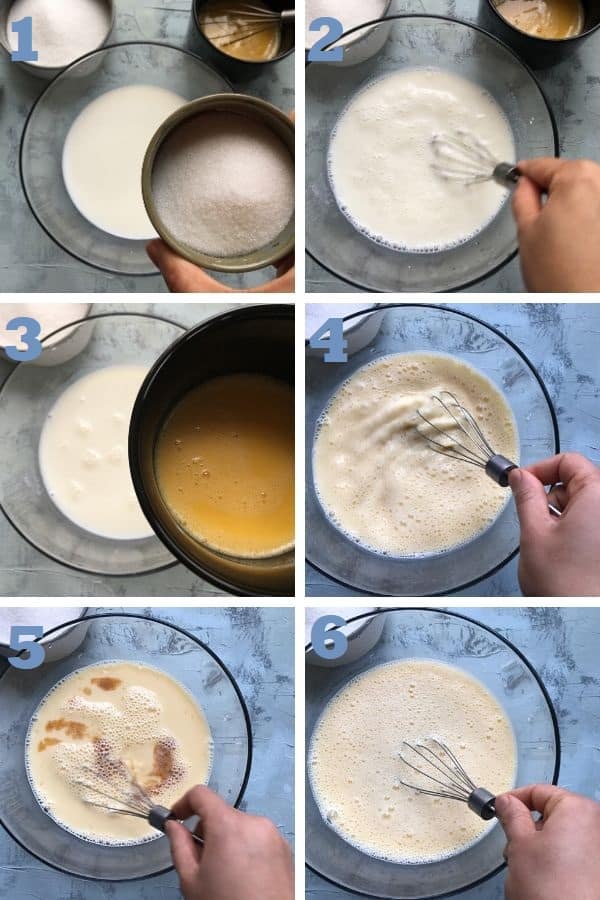
Dissolve the sugar first in the milk with the help of a hand whisk.
Than, pour in the beaten eggs. Whisk until the eggs are completely blended in the milk.
Add Vanilla and whisk until the custard is ready and everything is well incorporated.
Step #4 Pressure Cook Caramel Custard in Instant Pot
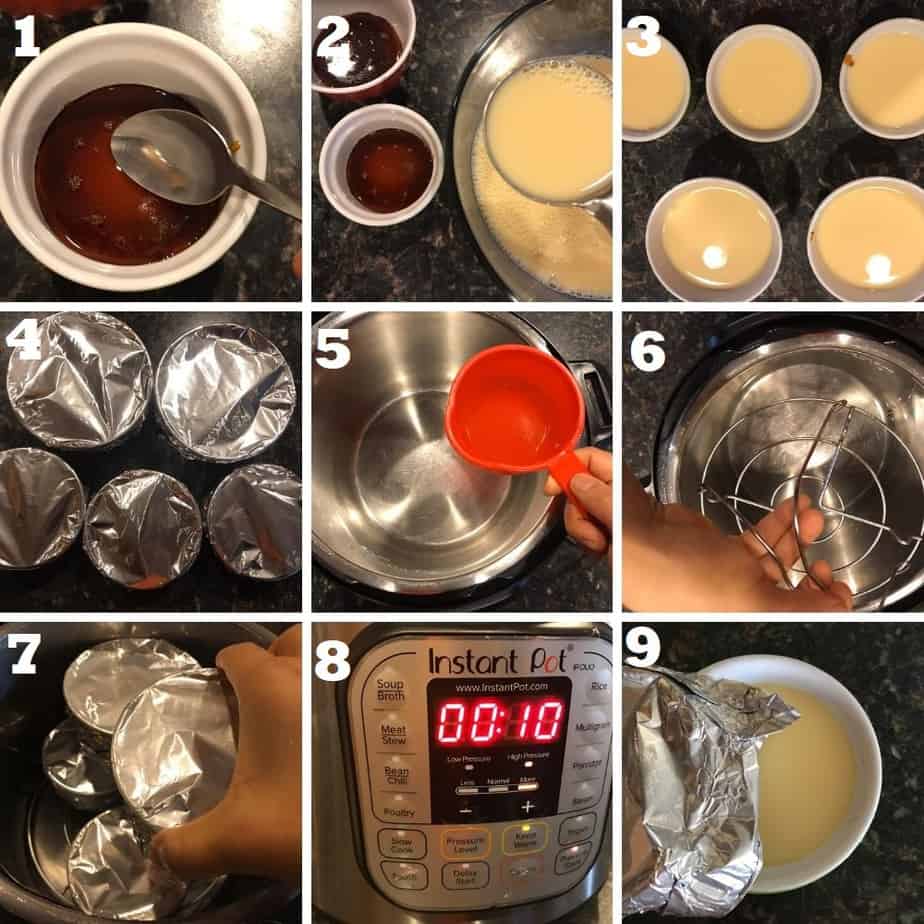
It's time to pour the custard into the caramel glazed ramekins.
Before, you pour the custard just do little test to check if the caramel sauce has set well in the ramekins. Tap the caramel sauce with the help of a spoon.
It should make a tapping sound, the spoon should come out clean. This means that the caramel has set hard.
Pour the custard into the ramekins. Avoid overfilling them.
Close the ramekins with aluminum foil. Just wrap the foil all around tightly.
Prep the Instant pot by pouring 1 cup water and placing the metal trivet inside the steel insert of the Instant Pot.
Stack the ramekins carefully on top of the other. Close the lid, seal valve and pressure cook on HIGH for 10 minutes followed by 10 minutes natural pressure release.
Once done allow the ramekins to cool down completely than pop them in the fridge and allow them to rest and set for a minimum of 2 to 4 hours.
Serve chilled enjoy!
FAQs
Yes, Caramel Custard contains eggs.
Caramel Custard tastes almost like flan but it's more delicate, less sweet and not as dense as a flan. It's melt-in-the-mouth soft with a good caramel punch.
Creme caramel lasts for 4-5 days in the fridge. If you choose to store them do not un-mold them, instead store the ramekins covered in the fridge. While serving you can un-mold the custard.
More Instant Pot Desserts:

Instant Pot Caramel Custard
Print Recipe Pin RateWatch Recipe Video
Ingredients
For Caramel Sauce
- ¾ cup white sugar (regular)
- 3 tbsp water
For Custard
- 3 large eggs (at room temperature)
- 2 cups Whole milk (preferably at room temperature)
- ½ cup white sugar (or ¼ cup if you prefer mild sweetness)
- 1 tsp Vanilla Extract (optional)
Equipment Used
Instructions
How to make the Caramel Sauce on the stove top?
- Set a deep bottomed saucepan over medium high heat. Add sugar and pour 3 tbsp water. Stir to mix a bit, not too much though. The sugar will dissolve on it's own and come to a bubbling boil. Immediately reduce the heat to medium. Allow the sugar syrup to caramelize.
- Stir frequently to prevent burning, and do not leave the syrup unattended because it burns in no time, believe me! You'll notice that the sugar will begin to caramelize and change in color. It'll turn pale and than peanut butter color, bourbon color and finally darken more to resemble a rich and dark amber color.
- The Caramel is ready. DO NOT touch it or lick it. It's super HOT and shall burn you badly.
- Immediately turn off the heat and pour the caramel in the ramekins. Give the ramekins a quick swirl in order to evenly coat the base with caramel. Leave them to rest while you prepare the custard.
How to make the Custard?
- Begin by beating the eggs very well so that the tough thread like transparent egg albumin blends well into a smooth silky consistency with the rest of the yolk. (Go through the step by step method and also the TIPS shared in the post). Beating the eggs will save you a lot of hard work and you don't need to strain the custard later in order to discard any lumps.
- Mix in the sugar in the milk first with the help of a hand whisk.
- Now, pour the beaten eggs into the milk. Mix thoroughly with the help of a hand whisk. Also add the vanilla extract and give everything a final good mix.
How to make Caramel Custard without oven and in pressure cooker / Instant Pot?
- Tap a spoon on top of the caramel to check whether it has set completely. The spoon should come out completely clean and make a tapping sound on the hardened caramel.
- Now, ladle out the custard and pour on the hardened caramel surface inside the ramekins. Do not overfill the ramekins.
- Make temporary foil covers for the ramekins. Wrap them tightly.
- Now, prep the Instant Pot by pouring about 1 cup water and placing the metal trivet inside the inner pot of the Instant Pot.
- Carefully stack the ramekins one on top of the other. I used 5 ramekins in total, 3 small and 2 with a capacity of 1 cup liquid each.
- Close the lid of the Instant Pot and seal the valve.
- Pressure cook on HIGH for 10 minutes. After 10 mins when the Instant Pot begins to make a beeping sound, wait for natural pressure release for 10 mins and than release the rest of the pressure manually.
- Open the lid of the pot carefully. And you can either allow the caramel custard to cool down completely inside the Instant Pot itself or you can bring them out of the pot and place them on the counter top to cool down completely.
- When the ramekins are completely cold pop them in the fridge and allow them to rest and set for at-least 2-4 hours.
How to unmold the Caramel Custard?
- You can serve the portion sized Caramel Custard in the ramekins or you may unmold them.
- To unmold run a kitchen knife around the edge of the custard (in between the custard and the ramekin). Place a clean plate on top of the ramekin, quickly flip to invert. The custard should pop out easily and smoothly. Give not give a gentle tap with the help of your fingers.
- You'll end up with a gorgeous, delicate custard all topped with delicious caramel sauce. Don't forget to slurp that caramel sauce with every morsel of custard that you eat. It's seriously a heavenly experience 😀
Notes
- Measuring Units Used, 1 cup = 240 ml & 1 teaspoon = 5 ml.
- Ramekins used: 5 in total. 3 small and 2 with a capacity to hold 1 cup liquid.
- Note: The caramel in the recipe is enough for 5 ramekins + 1 more large ramekin. So, you'll have a little leftover.
- STORING TIPS: Store the ramekins in the fridge for 4-5 days. Un-mold the caramel custard while serving.
- Caramel Custard tastes best when served chilled.
- WARNING: Never ever try to lick the hot caramel or touch it. I know it smells irresistibly good and very tempting but you must control yourself here, because it's not worth the effort 😀 you'll get BAD BURNS.
- Always add beaten eggs to the milk when making the custard it will save you so much work. Moreover, you don't have to strain the custard mixture once done mixing.
- Read the TIPS and Don't miss the step by step guide mentioned in this post. It's full of tips and tricks.
- You can also skip using the ramekins and make the Creme Caramel in a baking dish or steel container or even a cake mold that will fit in a 6 quart or 8 quart Instant Pot. Avoid push pans.
- Why use Ramekins? We love portion controlled and portable desserts. Ramekin desserts are conviniet to store, portable, portion controlled and look cute.


Sheena says
This was amazing! My first time making caramel custard and it turned out great! Next time, I would use the measurements for less sugar 🙂
Foodies Terminal says
So glad you loved the recipe Sheena 🙂 Thanks much for the wonderful feedback, appreciate it 🙂 Hope you'll try our other recipes from the blog as well 🙂 - Meghna xoxo.
Perlita says
I made this with 1 can of evaporated milk plus some skim to make 2 cups and 1/4 cup of sugar. I used 1/3 cup of sugar to make the caramel. I used four, 6 ounce custard cups and it made a a very nice serving . The flan itself was excellent and had a nice texture.
Foodies Terminal says
Hey Perlita so glad you enjoyed the recipe 🙂 - Meghna . xoxo
Jessica says
I can't wait to try this! Could we use 1% milk or evaporated milk in place of whole milk?
Foodies Terminal says
Hello Jessica I've not tested the recipe with 1% milk so I am not really aware of the results - whether it'll hold shape / set properly! I am sorry I could not be of any help to you 🙂 Thanks for reaching out and Take care Jessica. - Meghna - xoxo.
Shiva Amedeo says
Can I use silicone molds in this recipe? Any tips if yes?
Foodies Terminal says
Hello Shiva, I've not tested the recipe using silicone molds. I would recommend that you stick with either stainless steel containers or heavy duty oven safe glass containers. Hope you enjoy the recipe and huge apologizes for such a late reply! Take care. - Meghna.
Pati says
I have my mother's flan recipe and have made it several times but have not made it recently because it is complicated. I was THRILLED to see this recipe because it makes it look so easy and now we can make flan and think about my mother and grandmother more often. Thank you!!!
Shashi says
It is awesome. Loved the recipe. Wish I could post the picture
Foodies Terminal says
Hey Shashi we are so glad that you loved this simple caramel custard recipe 🙂 It's our family favorite and we love it just as much as you do. You can certainly share the photos with us on our Social Media Platforms, like Pinterest (https://www.pinterest.com/foodiesterminal/) and facebook (https://www.facebook.com/foodiesterminalusa) We will be thrilled to see your food pictures Shashi 🙂 Thanks a ton for trusting the recipe and giving it a try. Hope you try some other recipes too from my blog. Take Care Shashi 🙂 - Meghna.
Amrita says
Hi,
Im bstruggling a bit with the caramel. It becomes hard. Do i just add more water?
Foodies Terminal says
Hey Amrita, you can add a few tablespoons water to the hardened caramel, and place it over heat, stir and check the temp with a thermometer if you have one - it should read about 242 degree F. You need to act fast with caramel Amrita, and pour it quickly to the pots. Do it very carefully caramel is super hot! Hope it helps 🙂 Happy cooking & take care. - Meghna.
Sarah says
Oh my! This is a damn good recipe. Perfect in one go and I am now so much in love with my Instant Pot because of this recipe. I am a beginner Instant Pot user and wanted to make a dessert so badly in my pot and found your recipe Meghna. Thank you so much for sharing the recipe and the very informative post, your way of to-the-point explanation helped me follow the recipe and gave such awesome results. You earned a fan 🙂
Foodies Terminal says
Hey Sarah that's so awesome, I am so glad that you had great success with the recipe and loved it so much 🙂 Thank you for sharing your lovely feedback with us, keep coming back as we have more such easy beginner friendly recipe on our blog. And thank you once again, take care. - Meghna.
Swetha says
What can I use instead of ramekins? Are eggs used medium or large in size?
Foodies Terminal says
Hey Swetha, You can use any oven safe bowls instead of the ramekins, you can even use stainless steel containers that are food grade quality. And you can use medium or large eggs, both works great for the recipe and yields the same result. Hope you enjoy making the Caramel Custard 🙂 - Meghna.
Swetha says
Meghna, Thank you for the reply and I made this recipe. It was definitely very quick recipe to prepare and all your detailed explanation given made it still more easy to make.
But I faced a problem here, my caramel tasted a little bitter. I think it should be due to the reason that sugar got caramalized more than expected. I remember I was looking for dark Amber color and switched off immediately but can you pls guide with any other tip which I should look out for in caramelization so that I can switch off at the right stage? Also, let me know if I can light brown sugar for this recipe?
Foodies Terminal says
That's wonderful Swetha, I am so glad that you loved the recipe 🙂 I've never tried caramelizing light brown sugar Swetha so really don't have a clue to that. However, you can prevent over caramélisation of regular white sugar and prevent it from getting more bitter by controlling the heat throughout the process, scrapping the sides of the pan or pot continuously helps and results in an uniform caramélisation, last but not the least you can check the temperature with a thermometer and stop the heat once the temperature reaches to 340 to 350 degrees Fahrenheit. To be on the safer side I would recommend you to stop at the light amber color stage, see you you like the taste of the light amber colored caramel, it will be certainly less on the bitter side. Let me know Swetha if I can help you out with anything else regarding the recipe 🙂 You can reach out to us anytime. Thank you once again and do keep visiting us 🙂 - Meghna.