- Pinterest130
- Subscribe
- Total130
Instant Pot Ghee is a traditional golden ghee with a delicious rich nutty flavor & a lovely sweet aroma. Home-made ghee is all about knowing how long to cook the butter and when to stop. This is exactly what this post will teach you - Learn how to make Instant Pot Ghee step by step, how to store ghee and how to incorporate Ghee in your diet.
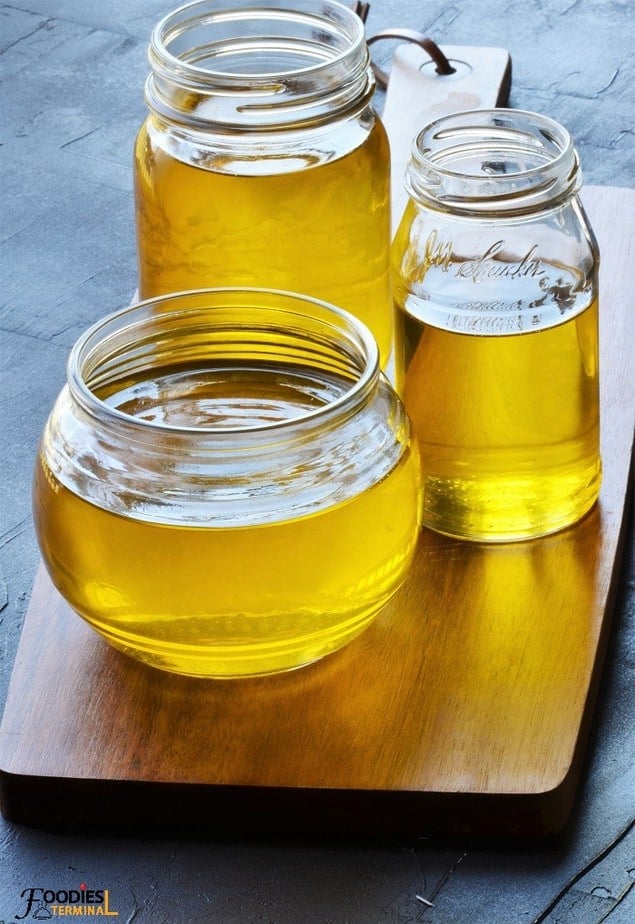
Golden Ghee Recipe
Ghee is a regular in my kitchen and I have been making it since 16 years and watched my mom and grandma doing the same since my childhood days.
However, they never made ghee from butter. They took the traditional route and made ghee from the skimmed layer of milk fat (Malai in Hindi).
And once the cooking cycle was over the kids in the house had the privilege to enjoy the browned milk solids as a treat with a generous dose of sugar. So yum!
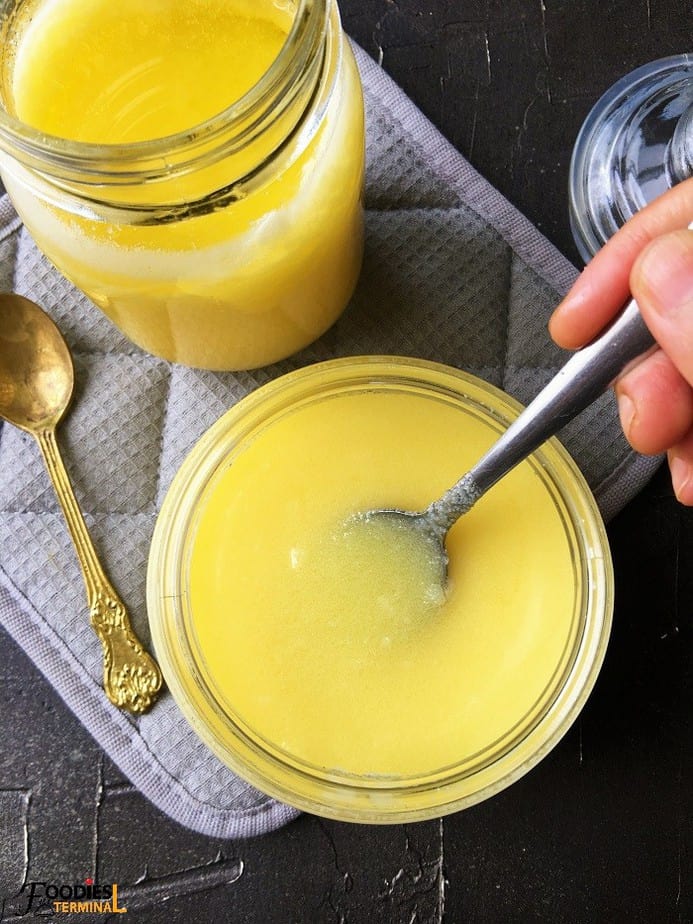
Homemade Ghee - why you should make it at home?
If you know the right method of making Ghee at home you will be pleased with the results and realize how easy the whole process is.
You should make traditional ghee at home because it is -
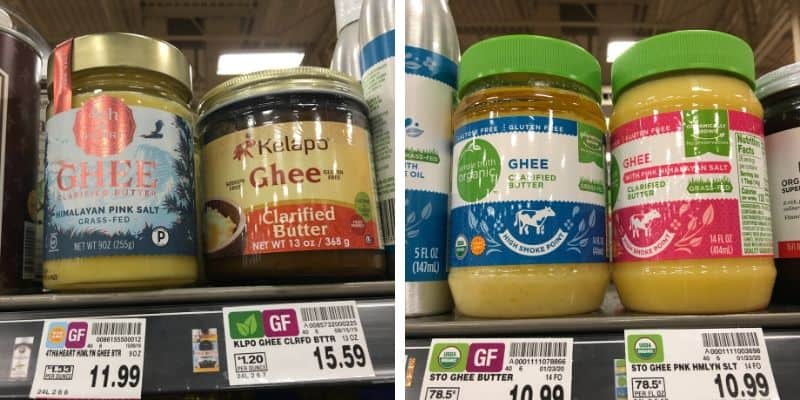
- Economical. Much cheaper than the store bought version. You can make 41 ounces ghee from $10 Butter! That's cheap! In the store it's 13 oz ghee for $11!
- So easy to make.
- A fail-proof recipe.
- Tastes amazing.
- Smells the best.
- You'll get the best quality ghee.
- Purest form.
- Shelf Stable.
- Lasts longer.
- You can choose the best quality butter.
- Tolerated well by Lactose intolerant as it is lactose free.
What is Ghee?
Ghee is a class of clarified butter that has been simmered and cooked over low heat a little longer to remove the water content completely, and until the milk solids begin to brown lending the ghee a toasted nutty flavor and an irresistibly good aroma.
The browned milk solids are later skimmed or strained to leave behind the golden ghee.
As a result, traditional ghee is pure butter fat.
Ghee has a high smoke point of 465 F as compared to butter's 350 F, which is why it is one of the best fats for cooking and frying.
It's a staple in Indian homes and extensively used in Indian cooking, South-West Asian and also Middle Eastern cooking.
Ghee plays a vital role since centuries in Ayurveda and is regarded as one of Ayurveda's most prized possession due to it's numerous health benefits.

Best Butter for making Instant Pot Ghee
You can use any unsalted butter to make homemade ghee however, organic butter from grass fed cow milk shall reward you with the best ghee with outstanding flavor and aroma.
Here's a few butter brands in the USA that yields a lovely pot of traditional homemade ghee every single time:
- Kerry Gold Irish Unsalted Butter ( Costco, Whole Foods and other Supermarkets).
- Local Organic Butter Rolls (Whole Foods and Kroger). These are huge and we love them.
- Kirkland Organic Unsalted Butter (Costco).
- Regular (not organic) Kirkland Unsalted butter (Costco).
- Horizon Organic Unsalted Butter.
- Simply Nature Organic Butter (Aldi).
- Organic Valley Pasture Butter (Walmart, Kroger, Meijer).
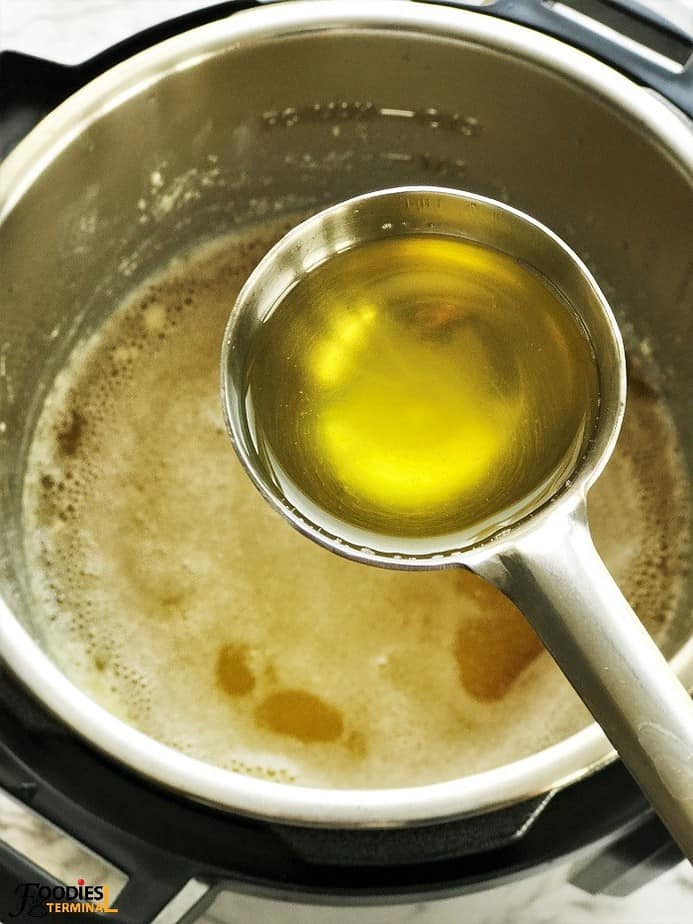
Pro Tip: You can use any generic supermarket brand (not organic) unsalted butter to make Ghee, however, Organic Butter preferably from grass fed/pasture raised cow milk (be it local or Name Brands) shall give you the best pot of golden ghee. We tried all the above butters and are more than pleased with the result. Organic butter has slightly less water content as compared to un-organic butter, hence, yields more ghee.
Instant Pot Ghee - Foodies Terminal Tips
- For best homemade ghee use Organic Butter made from grass fed or pasture raised cow milk.
- Cook the butter over low heat. This is a must,
- For grainy, gritty ghee a consistent low heat setting is a must.
- Skim the gathering surface foam at regular intervals.
- Clarified Butter is not ghee. However, ghee is a form of clarified butter that's cooked a little more.
- Turn off the Instant Pot immediately once the milk solids settled at the bottom of the pot begin to just turn golden.
- Allow the milk solids to brown completely with the help of the residual heat. You'll have the best ghee ever.
- Strain the ghee when still warm. It'll glide through the sieve easily. Ghee thickens and begin to solidify while cooling down.
- Use the browned milk solids to flavor soups, dals or flour.
- Always store ghee in dry, dark place away from any heat source.
How to make Ghee in Instant Pot? Step by Step
Step #1 Melt the Butter in the Instant Pot
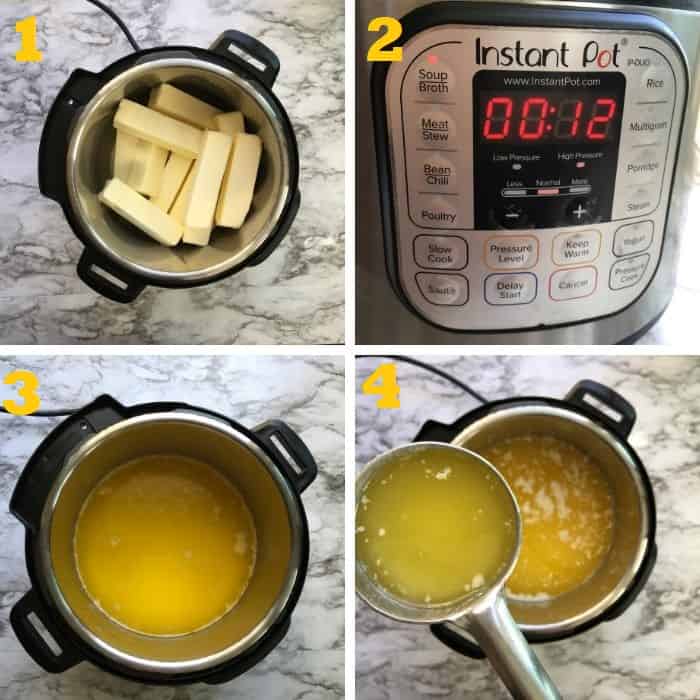
There's an easy way to melt the butter in the Instant Pot and that's by pressure cooking on HIGH for 12 mins.
However, this step is OPTIONAL. You can totally hit the SAUTE mode keep it at HIGH and watch the butter blocks melt into a poodle.
In case, you choose to pressure cook, once the cooking cycle is up do a quick pressure release and open the lid. CANCEL the PRESSURE COOK mode and turn on the SAUTE ans keep it at NORMAL.
Step #2 Simmer melted butter
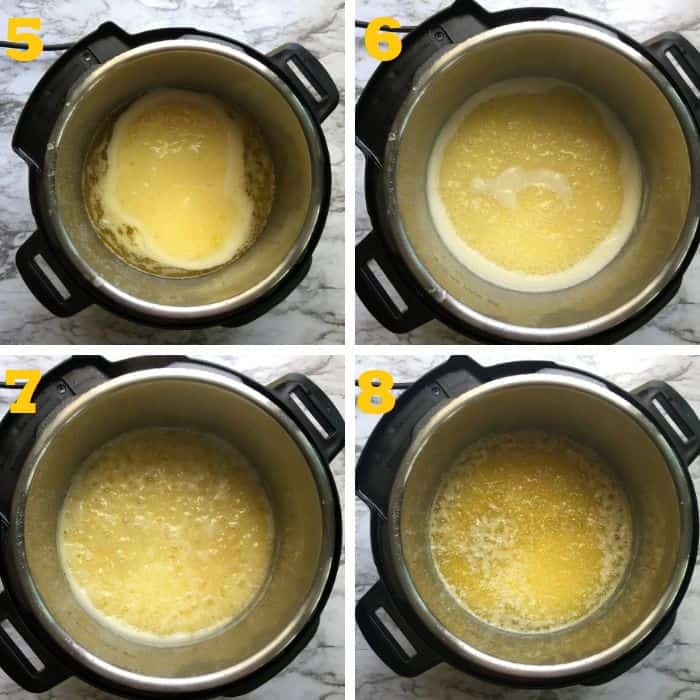
Continue simmering the melted butter on SAUTE at NORMAL.
You will notice bubbles/foam forming on the surface and gradually the butter will change from opaque to transparent.
Step #3 Simmer more until the Clarified Butter stage is reached
Continue cooking the butter until it becomes fully transparent and the milk solids begin to separate. The milk solids will remain pale at this stage.
They are those little specks of pale yellow solids sinking towards the bottom of the pot.
You will also notice that the bubbles will grow in size and than slowly reduce.
This is completely perfect.
Step #4 Cook until milk solids brown and ghee is formed
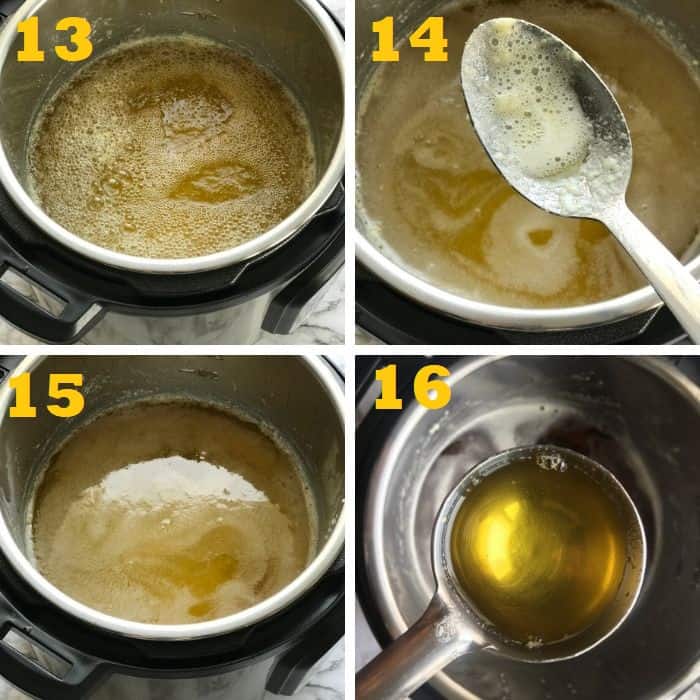
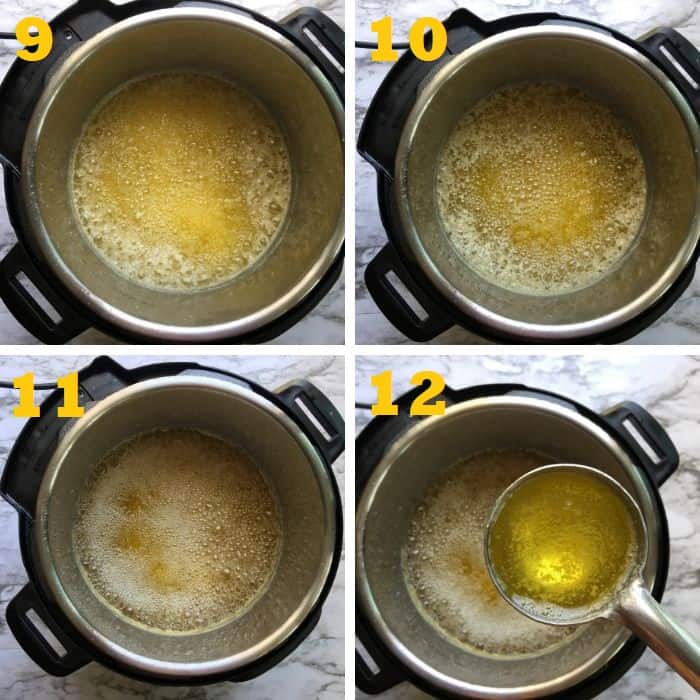
Once, the ghee reaches the clarified butter stage (beautiful transparent pale yellow color liquid) you must watch the ghee like a hawk so that the milk solids do not burn.
You need to brown the milk solids by cooking the ghee a little more but never burn the mild solids.
Reduce the temperature of the Instant pot to LOW and continue cooking.
A good ghee gets it's rich nutty flavor and a beautful aroma from the browned milk solids.
So, do not stop cooking the ghee once you rich the clarified butter stage, you need to cook more. Lol! I am saying this so many times I know 😀
Skim the foam from the top layer. Keep repeating.
As the milk solids begin to brown turn off the Instant Pot.
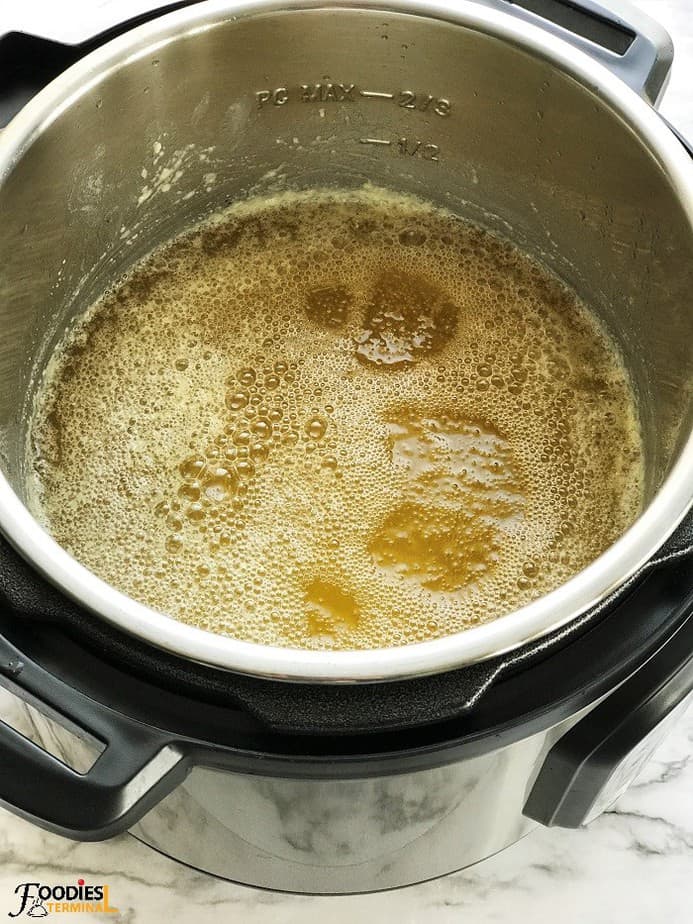
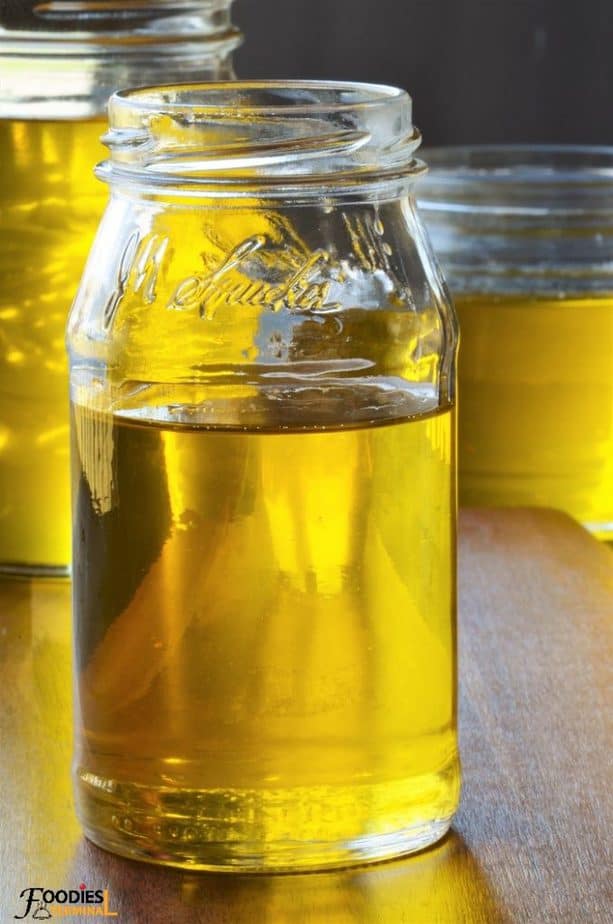
The ghee will continue cooking with the help of the residual heat and you will have a gorgeous bright yellow color golden ghee with dark brown milk solids all settled at the bottom of the pot.
Allow the ghee to completely cool down.
Strain with the help of a fine strainer, a mesh cloth, a tea strainer, cheese cloth or a coffee filter.
Store in glass jars or earthen pots covered in dry, dark place away from any heat source.
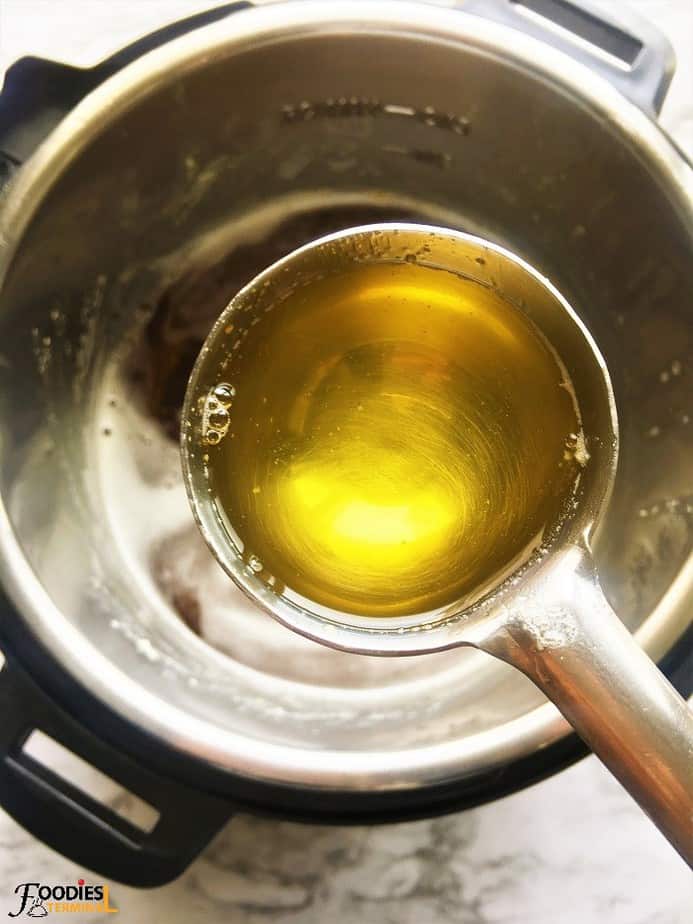
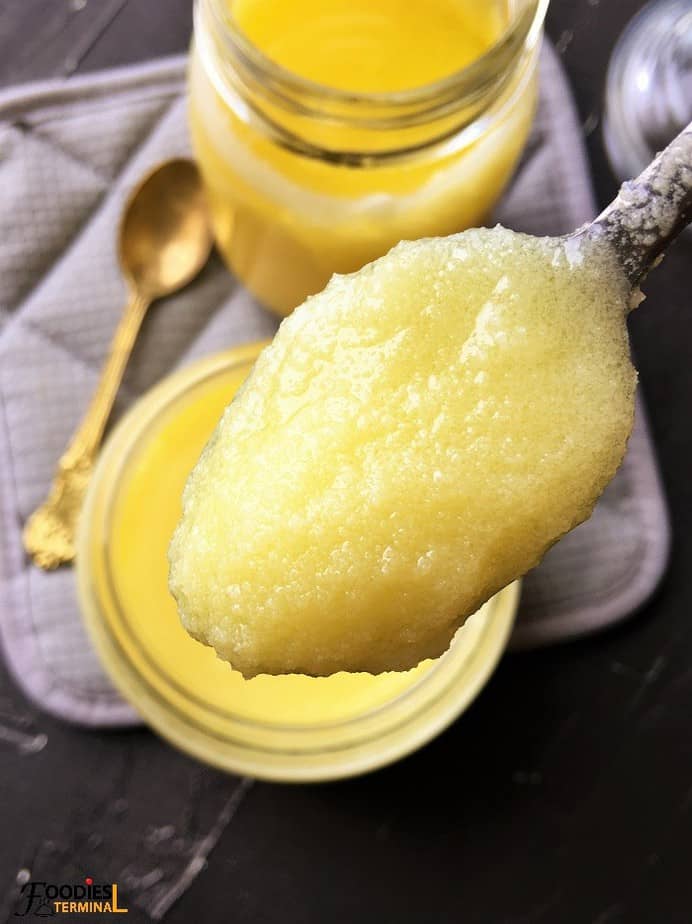
Pro Tip: Ghee will solidify in cold temperatures. The consistency of ghee will entirely depend on the weather conditions you live in, if it's hot ghee will remain semi solid or even liquid on the counter top. At colder climates ghee will solidify.
How to store homemade ghee?
You can store homemade ghee in either clean and moisture free glass jars or containers or you may store it in earthen pots and keep them covered.
How long does homemade ghee last?
Homemade ghee will last for 6 months on the counter top when stored in moisture free glass jars or earthen pots and kept in a dry, dark place away from any heat source.
When refrigerated Instant Pot ghee will last for upto 1 year without going rancid.
Ghee Vs Clarified Butter
Though many think that ghee and clarified butter are the same thing, yet they are not. Ghee is a form of clarified butter but it's not exactly clarified butter.
I know it's confusing. Let's find out the difference.
[table id=5 /]
Does ghee go bad?
Yes, ghee just like any other food goes bad when not stored the right way and under right conditions.
For instance, a wet spoon used to scoop out ghee from a jar might lid to spoilage.
Ghee when gone bad will taste and smell sour, rancid, look very pale, loose it's nutty and rich flavors.
It will begin to smell funny. If this is the case discard it and make a fresh batch.
Instant Pot Ghee Recipe - FAQs
Can you make ghee with salted butter?
Yes, you can make ghee with salted butter. Salted butter when melted and simmered splutters more as compared to unsalted butter.
How can I make aromatic ghee at home?
You can make aromatic ghee at home by cooking down the clarified butter for 20-25 minutes over low heat.
The separated milk solids are gradually cooked down and allowed to get brown this is what imparts a great depth of flavor and a rich nutty taste to homemade ghee making it very aromatic.
Why is my ghee grainy?
Grainy ghee denotes that the ghee is done correctly, it is cooked at low consistent temperatures and not rushed through. It means that the antioxidants are all intact.
The grainy texture of ghee is like a reward to ghee makers, it's more of an accomplishment.
Grainier the better.
Therefore, if your ghee is grainy or gritty don't think that it went bad, or you did something wrong.
It means you accomplished making ghee the right way.
Does ghee taste like butter?
Ghee does not taste like butter and lacks the smooth, creamy mouthfeel of butter. Ghee tastes nutty, rich, with lots of caramelized aroma.
Can I use ghee on toast?
Yes you can use ghee on toast as a spread, it tastes very good.
Why is my ghee separating?
At hotter climates ghee separates. It resembles a semi liquid state.
You may notice melted top whereas a semi solid center.
Don't panic it's perfectly normal.
Can I use ghee to fry eggs?
Yes, you can use ghee to fry eggs and many other things. Ghee has a high smoke point and hence, it is great for frying and sauteing.
Since, the milk solids are removed while making ghee it is a great alternative to cook, fry, saute, bake food at higher temperature without smoking.
When should we use ghee?
You can use ghee in multiple ways like....
- Ghee makes a great spread over toast, chapathi, bread etc.
- It's great for frying or skillet roasting meat and veggies.
- You can even use it in baking.
- Ghee is a great sub for oil and butter. Use it in place of normal oil or butter.
- A dollop of ghee makes a bowl of steamed rice taste even better.
Why won't my ghee solidify?
Ghee sometimes doesn't solidify which is fine because the ambient temperature of the kitchen or wherever you store it is not cold enough.
Liquid ghee or semi liquid ghee is perfectly fine and normal. It doesn't mean that you did something wrong or the recipe is not good 🙂
Why is my ghee white?
Ghee remains white when under-cooked. If you stop cooking the butter at the clarified butter stage it will result in a very pale ghee almost white i color.
Why is my ghee brown?
Ghee when cooked slightly more turn brown in color. The brown ghee has more depth of flavor, an intense nutty taste, unmistakable good aroma and tastes the best.
Brown ghee will have outstanding caramelized notes, imagine toffee!
When beginning to solidify it should look like this.
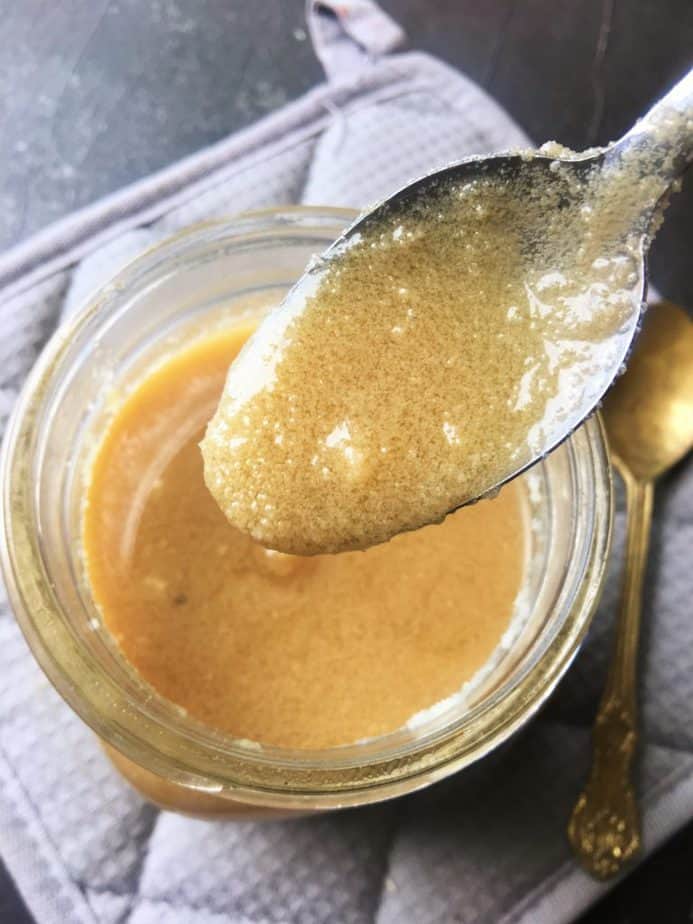
Brown ghee doesn't mean that you burnt the ghee or it has gone bad.
Trust me it tastes even better than the golden ghee.
This type of ghee is quiet popular all over eastern part of India.
Some Easy Instant Pot Recipes from FOODIES TERMINAL.
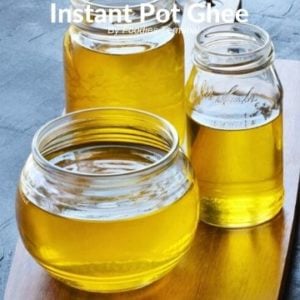
Instant Pot Ghee
Print Recipe Pin RateWatch Recipe Video
Ingredients
- 2 pounds Unsalted Butter (1,812 grams )
Equipment Used
Instructions
- Add the Butter blocks or slabs to the Inner steel pot of the Instant Pot. Close the lid seal the valve and PRESSURE COOK on HIGH for 12 mins.
- Once the cooking cycle is over do a quick pressure release and open the lid of the pot. Also, CANCEL the PRESSURE COOK option. This step is totally OPTIONAL. You may however, melt the butter by hitting the SAUTE mode as well. The melted butter will look opaque.
- Now, set the instant pot on SAUTE and keep it on NORMAL. Simmer the butter. The butter will gradually change from opaque to translucent. A layer of foam will form on the surface (imagine soap scum); Skim off the top foam with the help of a spoon. Repeat this step several times.
- Simmer the butter more (10-12 mins approx.). You will notice milk solids separating and settling down. The translucent butter will gradually become completely transparent with a pale golden hue. This is known as the Clarified Butter and not ghee. The pale yellow milk solids will begin to sink at the bottom of the pot. Do not stop cooking at this stage, ghee is just a few simmers away!
- Now, reduce the temperature of the Instant Pot to LOW. Cook the clarified butter for another 10-15 mins. Skim off any foam layer from the surface with the help of a spoon. Repeat this often. You'll notice that the milk solids will just begin to turn golden brown.
- Immediately turn off the Instant Pot. The clarified butter will continue cooking with the help of the residual heat and after 10-12 mins you'll end up with a pot of liquid gold - absolutely nutty, fragrant golden ghee with a crystal clear consistency and a rich golden color. The milk solids will become dark brown in color, this is what will give the homemade ghee a rich nutty flavor.
- Allow the ghee to completely cool down. Than strain the ghee through a fine mesh sieve, tea strainer or a fine muslin cloth. Store in dry glass jars with lid on in a cool dark moisture free place and away from any heat source.
Notes
- Measuring Units used, 1 Cup = 240 ml and 1 teaspoon = 5 ml.
- Todays Recipe Yeilds: 41 Ounces or 1,1163 grams Pure Golden Ghee. I used 2 pounds unsalted organic Butter from Costco (Kirkland).
- Keep the heat consistent and low to get the best grainy textured Ghee.
- Want Smooth and Creamy Ghee? Cook the butter on high and skim off any foam that forms at the surface.
- Is Brown Ghee bad? No it is not. It's just more intense with a deep nutty toasted flavor and aroma. It has more caramelized notes, imagine toffee. We love this ghee a lot.
- Spluttering butter is it normal? Yes, it's normal, when you'll cook the butter it will splutter a lot because butter contains a good amount of water. However, organic butter contains less water and hence, splutters a lot less.
- White ghee, what's wrong? Ghee made from Buffalo milk butter or buffalo milk (available widely in India) is white in color. And ghee that's under cooked is white in color as well. Cook the butter well until the milk solids sinks at the bottom of the pot and become nicely brown in color. That's when you'll have golden ghee that's absolutely amazing.
- Ghee can be made from both salted and unsalted butter. Salted butter will yeild less ghee as compared to unsalted butter.
- STORING TIPS: Store ghee in dry, clean, moisture free air tight glass jars or earthen pots. Store the jars and pots in a dry, dark place away from any heat source.
- SHELF LIFE: Lasts for 6 months on the counter top when unopened, lasts for 3 months on the counter top when opened.
- Lasts for 1 year in the refrigerator.
- Lasts couple of years or for an indifinite amount of time when frozen.
- How to use the left over brown milk solids? Use them in soup recipes, to knead dough, in Indian Dal recipes and curries. Kids in India sometimes relish the brown milk solids as such with a generous dose of sugar.
- The right consistency of GHEE? It depends on the ambient temperature of the place where you choose to store the ghee. Ghee remains liquid at warmer, hot regions/climates. It may have a runny surface and a semi solid center. Ghee becomes solid at colder climates/regions. Don't worry if your homemade ghee passes through different consistencies throughout the whole year 😀








James says
We love Ghee a lot and I've been looking to try Instant Pot Ghee recipe but honestly didn't dare to give it a try..Lol! I found your recipe and the detailed steps, information and very precise instructions gave me a lot of confidence and I somehow managed to try it. I just reduced the amount of butter and that's the only change I made. I must say it gave me excellent result at the first go and all thanks to you as I could not have done this without your helpful instructions. Not going back to store bought ghee anymore 🙂 Thank you for the great post and the instructions.
Foodies Terminal says
Oh! James how awesome is that, I am so so glad that you found the post so helpful and made a great pot of ghee. Terrific! Thanks a bunch for your super awesome feedback and do keep coming back 🙂 Take Care James. - Meghna.