- Pinterest2.5K
- Subscribe
- Total2.5K
Make Instant Pot Hibachi Fried Rice with pantry staple ingredients & enjoy an Asian take-out style dinner at home. This Hibachi Fried Rice is packed with amazingly savory flavor & has perfectly cooked Jasmine rice, frozen veggies, delicious chunks of scrambled egg. Tastes amazing with Yum Yum Sauce!
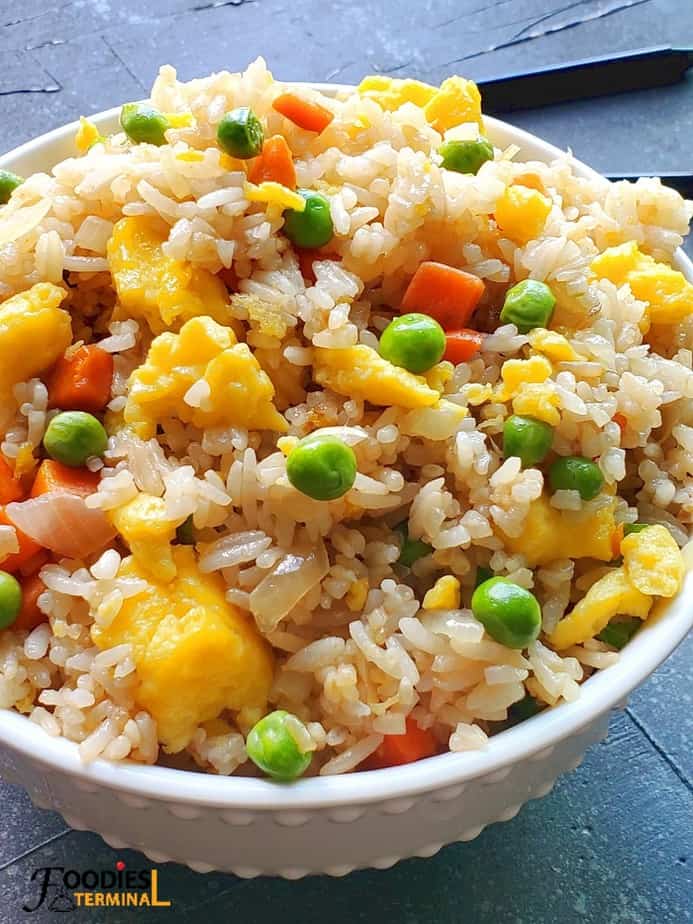
Hibachi Fried Rice
Yes, you can make a fabulous Hibachi Fried Rice in your Instant Pot under 30 mins with minimal ingredients.
To give the dish the best Hibachi flavor (hot griddle flavor) we made the recipe in stages.
We cooked the rice first, Chilled it, scrambled the eggs separately & than tossed the chilled Jasmine rice with the veggies, sauces, & fluffy scrambled egg.
So yum! So good!
You can also freeze this Instant Pot Hibachi Fried rice and enjoy it for weeks.
It's a perfect candidate for meal preps, lunch boxes, gatherings, budget dinners & potlucks.
Just make sure to make a large batch because it runs out fast 😀
Ingredients
Find the Ingredients with actual measurements way below the post on the "Recipe Card". The list below is just a reference.
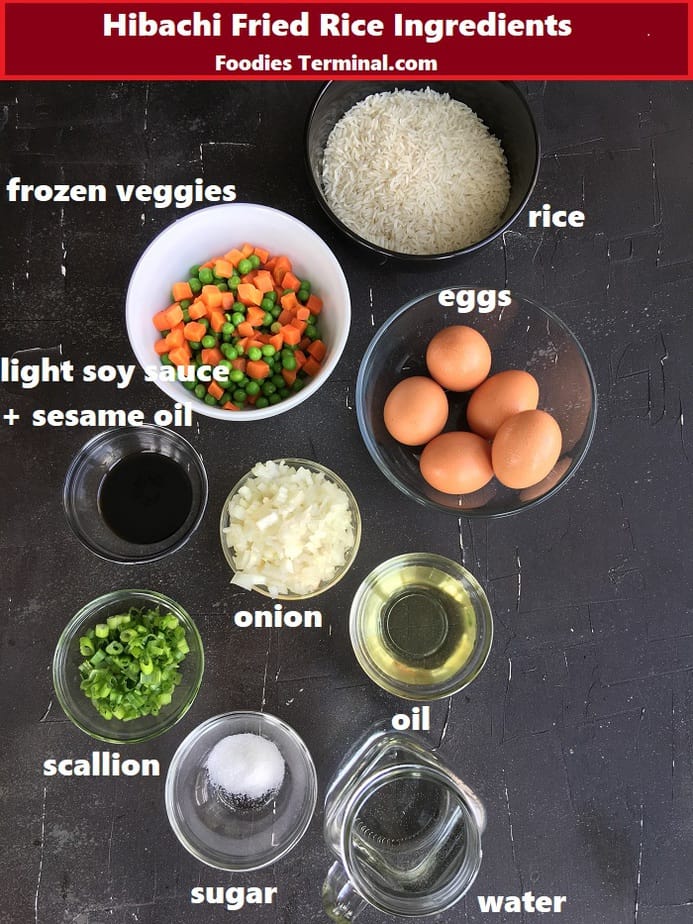
- Jasmine Rice: Cooked and chilled.
- Eggs: Scrambled into fluffy big chunks.
- Veggies: I used a mix of frozen & thawed diced carrots and peas. You can also use fresh veggies.
- Onion: I used yellow Onion.
- Light Soy Sauce: You can use Tamari as well.
- Sesame Oil.
- White sugar: This helps balance the savory flavor.
- Garnish: Chopped Scallions.
- Any neutral oil of your choice. I used Avocado oil.
Tips & Tricks
- Cook & chill the Jasmine Rice: This will reward you the best Hibachi flavor in your pressure cooker & will result in a fluffy Hibachi rice that's even better than take-out.
- Frozen Veggies: Thaw & use them. You don't need to saute them much.
- Fresh veggies: Dice them into small squares & saute them according to your preference. Requires a little more sauteing as compared to frozen veggies.
- Scramble the eggs separately: Hibachi fried rice doesn't taste good if you can't find the scrambled eggs in the finished dish. For a good mouthfeel scramble the eggs without stirring briskly. As a result you'll have nice large fluffy scrambled egg bites that won't disappear in the fried rice.
- Mix the chilled rice in batches: This helps to incorporate the rice with the veggies very well. Gives you better control.
- Sauce & sesame oil: Mix them at the end.
- Low Heat settings: Keep the Instant Pot SAUTE settings to LOW when you are ready to mix the rice. Otherwise the rice will stick at the bottom of the pot indefinitely.
- Rice: Mix the chilled rice gently by fluffing it with a fork. This will prevent the rice grains from breaking.

Method
** Recipe steps in words below pictures
Find the detailed step by step recipe along with measurements way below the post on the "Recipe Card".
Step #1 Cook the rice & Chill
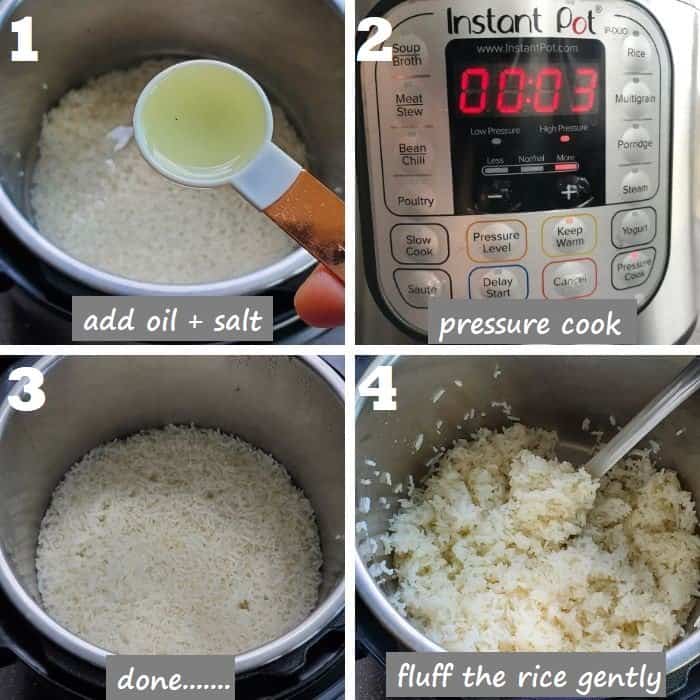
Rinse the rice very well. Add it to the inner pot of the Instant pot along with oil & salt (helps flavor up the rice).
Pour water & PRESSURE COOK on HIGH for just 3 minutes followed by a QUICK RELEASE.
Gently fluff the cooked rice with the help of a fork.
You may spread the rice on a plate or tray to cool it down faster or store it in a regular container.
Than pop it in the fridge to chill while you prep the rest of the recipe.
Step #2 Scramble the eggs
Add oil in the inner pot and gently pour the whisked eggs (SAUTE function set at NORMAL), do not stir the eggs for 10 seconds.
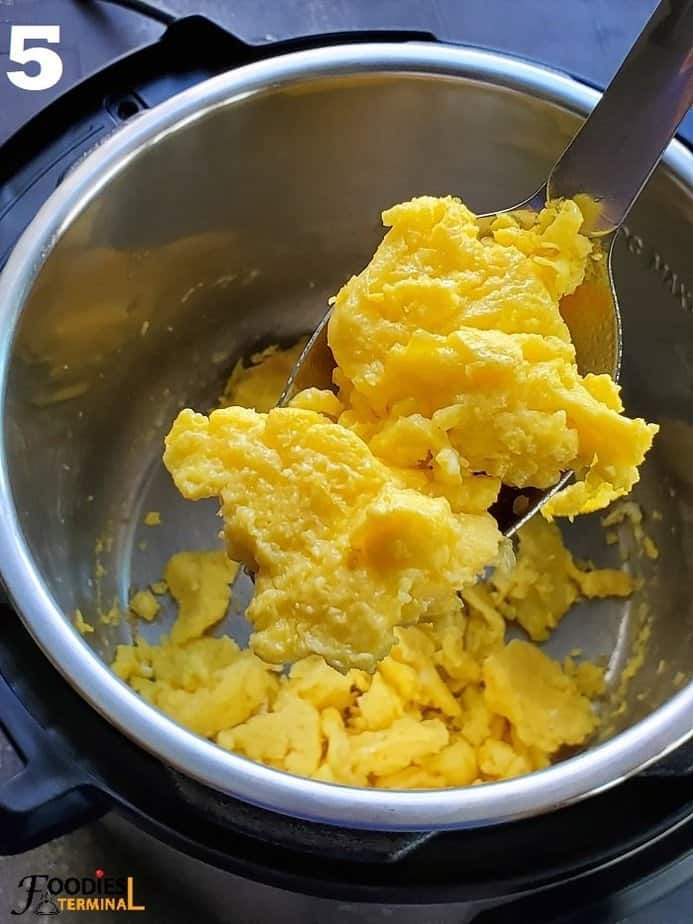
Reduce the heat to LOW and stir the eggs to make scrambled eggs that are large in size (we'll break them later).
Scrape the bottom of the pot with the help of your spatula while scrambling the eggs.
Too much stirring will crumble the eggs into very smalls pieces. Set aside the scrambled egg.
Step #3 Assemble the rice
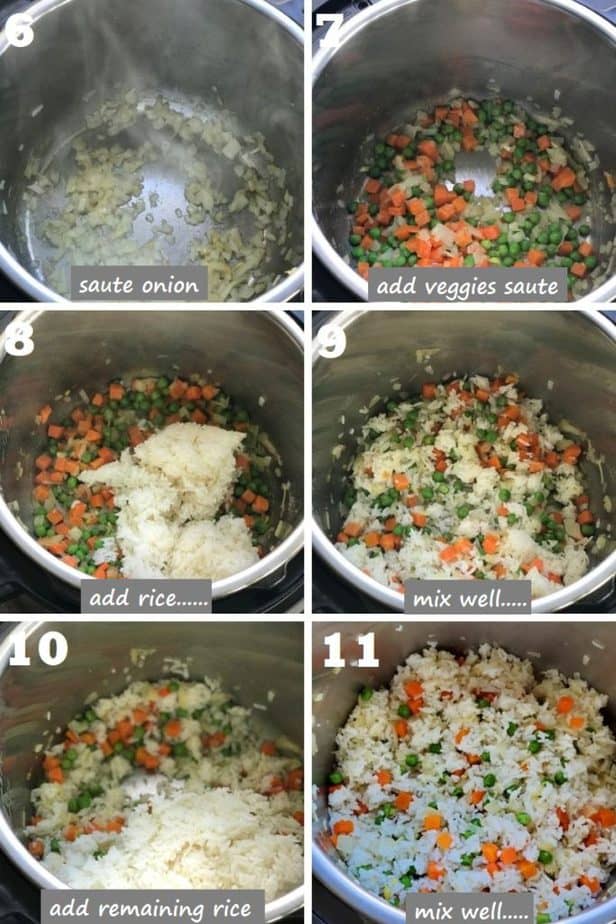
Add more oil into the steel insert of the Instant Pot and saute the onions until they begin to become limp.
Than, add the veggies of your choice and saute according to your preference.
Crisp tender veggies = Saute less.
Softer Veggies = Saute more.
I used frozen thawed veggies and sauteed them from about 2-3 mins. But, if you frozen veggie packet contains green beans or broccoli you need to saute a bit more.
Now, add the chilled Jasmine Rice in batches and gently mix with the veggies. Fluffing the rice with a fork always helps in mixing and prevents the rice from breaking.
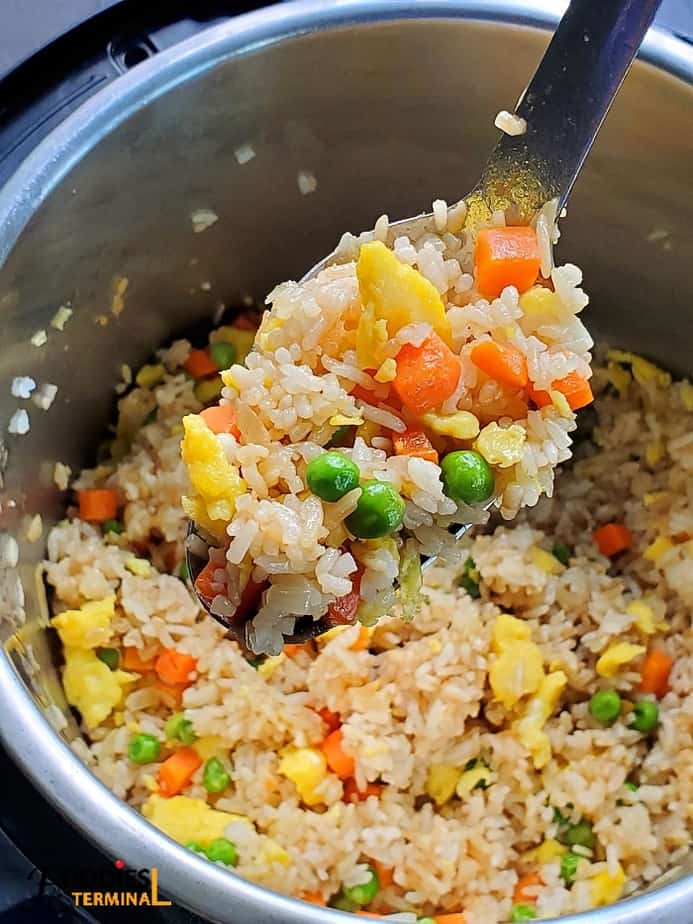
Step #4 Add sauce & scrambled eggs
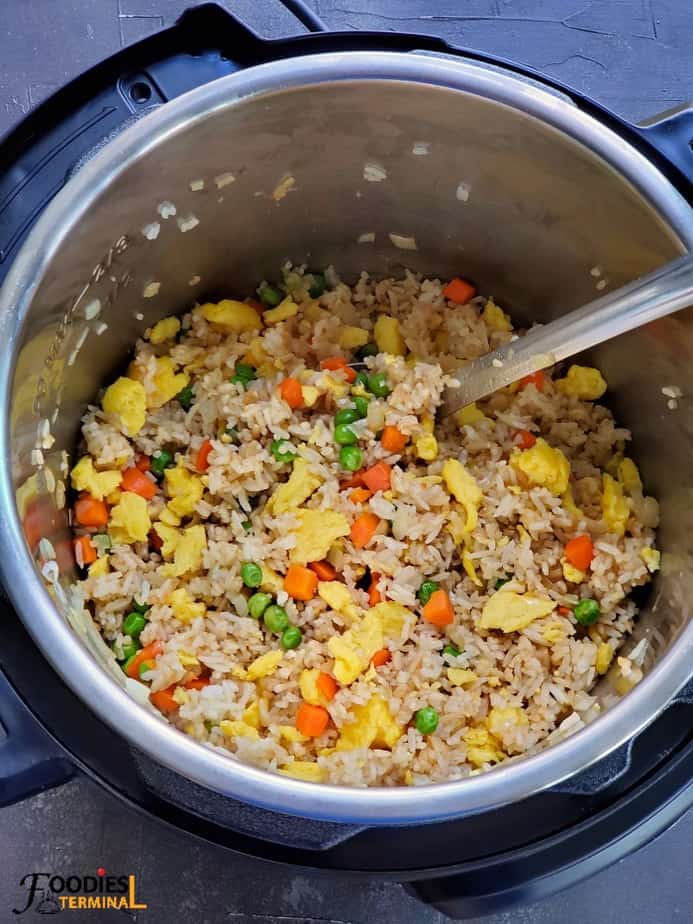
Finally add the sauce, sesame oil. Mix gently.
Add back the scrambled eggs and give everything a final good mix.
**Note: I broke down the large scrambled egg chunks into medium pieces before adding them.
We don't want the eggs to disappear in the Hibachi Fried Rice completely. Hence, kept them nice and large.
Storing Tips
Fridge: Lasts for 6 days in the fridge when stored in air tight container.
Freezer: Lasts for 3 months when stored in portion sized freezer safe bags or containers. Easier to thaw & re-heat.
Serving Ideas
Check out our very popular Asian-Take out recipes from the blog. You'll find your favorite accompaniment.
You might like this


Instant Pot Hibachi Fried Rice
Print Recipe Pin RateWatch Recipe Video
Ingredients
- 1.5 cups Jasmine White Rice (Rinsed very well)
- 1 cup frozen thawed carrots & peas (**Read Notes below)
- 1 medium yellow onion finely chopped
- 5 small eggs whisked (or 4 large)
- 1 tsp regular white sugar
- 2 tbsp light soy sauce (or Tamari)
- 1 tsp sesame oil
- 3 tbsp chopped scallions (for garnish)
- 6 tbsp avocado oil divided into equal parts (or use any neutral oil)
- Salt (to taste)
Liquid
- 1.5 cups Water
For the Rice
- 1 tsp Avocado oil
- ½ tsp Salt
Equipment Used
Instructions
Cook the Jasmine Rice
- Rinse the rice very well several times under running tap water until clear water runs through. This is very important and prevents the rice from becoming sticky. An excellent way to rinse the surface starch of rice.
- Add the rinsed rice to the steel insert of the Instant Pot along with equal amounts of water, 1 tsp avocado oil or any neutral oil & ½ tsp salt. This instantly flavors up the cooked rice & the oil keeps the grains nice & fluffy.
- Close the lid of the Instant Pot, seal the Valve. Pressure Cook on HIGH for 3 minutes.
- Once the pressure cooking cycle is over the Instant Pot will begin to beep. Wait for 10 minutes NATURAL PRESSURE RELEASE and than release the rest of the pressure manually by moving the valve from the sealing to the venting position.
- Carefully open the lid of the pot and gently fluff the steamed Jasmine Rice with the help of a fork.
- Immediately transfer the cooked rice into a bowl or a large plate allow it to cool down and than pop it in the fridge to chill it. In the meantime proceed with the rest of the recipe. Chilling the rice will help you make the best ever Hibachi fried Rice and keep the rice grains nice and fluffy.
Scramble the eggs
- Set the Instant Pot on SAUTE and keep it on NORMAL. Add 3 tbsp oil into the steel insert of the Instant Pot.
- When the oil becomes moderately hot add the whisked eggs and do not stir for about 10 seconds. Reduce the heat to LOW.
- Stir the eggs every now and than until they scramble into large chunks. Set aside the scrambled eggs. It's very important to keep the scrambled egg pieces large. We'll break them later.
Make the Hibachi Fried Rice
- Before you begin assembling the Hibachi Fried Rice set the SAUTE function of your Instant Pot to NORMAL.
- Now, add 3 tbsp oil. When the oil becomes moderately hot add the chopped onions and saute until the begin to become limp or translucent.
- Next, add the thawed frozen veggies like diced carrots & peas (read Notes below). Saute the veggies along with the sugar for about 2-3 mins for crisp tender veggies and saute a little longer for softer veggies. It's upto you. We love crisp veggies in all our Asian recipes.
- It's time to mix in the chilled cooked Jasmine Rice. Reduce the Instant Pot Heat to LOW. Mix the rice in two batches. This will help to incorporate the veggies very well with the rice without stirring too much. I always use a spatula and than a fork to mix the rice in stages and I do it gently. As a result the rice grains do not break.
- Once you are done mixing the chilled rice add the sauce and the sesame oil. I love to mix the sauce with the oil and than pour them together. Once again gently mix the fried rice so that each rice grain is beautifully coated with the sauce. A fork always helps to fluff and mix the fried rice.
- Turn off the Instant Pot and add back the scrambled eggs. Before adding them break the larger chunks into slightly smaller chunks about ½ or 1 inch long. Gently mix it with the Hibachi Fried rice and enjoy restaurant quality meal with some Yum Yum sauce.
Notes
- Frozen Carrots & Peas: Thaw and use them. Saute less for crisp tender veggies and slightly more for softer veggies. It's totally upto you 🙂
- Butter: You can also swap the oil with butter while sauteing onion and veggies or additonally add 2 tbsp butter just before mixing the rice. Adds more flavor. However, I skipped adding any butter.
- Soy Sauce: If you prefer more sauce you can totally add some more.
- Sugar: Little of sugar balances the savory flavor to a great extent. I'll highly recommend adding it.
- Left-over Rice: You can use left-over rice to make this recipe. It works very well.
- Chill the cooked Jasmine rice: Hot rice tends to break a lot & mush up. Chill your cooked Jasmine rice for best texture & flavor.
- Storing tips: 6 days in the fridge & 3 months in the freezer.
- Measuring Units used, 1 cup = 240 ml & 1 teaspoon = 5 ml.


Colleen says
Very Good, used left over brown rice and added a left over pork chop cut into small dice sautéed with onions, used stir fry frozen vegetables, be sure to make the yum yum sauce - we really like this recipe Great way to use left overs
Foodies Terminal says
Thanks so much for the wonderful feedback Colleen, appreciate it and a lot 🙂 We are so glad that you enjoyed the recipe. Hope you'll try our other recipes as well and take care Colleen 🙂 - Meghna. xoxo
Christy says
I am so excited to try this recipe. I would like to double the recipe. Have you tried that? If so, would I just double the cooking times? Thank you for your help.
Foodies Terminal says
Hey Christy, that's awesome, we are so glad to know that you are looking forward to trying the recipe. You do not need to double the cooking times, just double the ingredients that's all you need to do 🙂 hope you enjoy the recipe Christy, it would be awesome for all of us here if you could come back to share your feedback with us 🙂 Thank you and take care. - Meghna.
Hailey says
The best Hibachi Fried rice I have ever made 🙂 Thanks a lot for this fabulous recipe, took it too office and my colleagues were begging for the recipe...Lol! Can't wait to try your other recipes Meghna 🙂
Foodies Terminal says
Thanks a lot Hailey for your lovely feedback 🙂 I am so glad that your office colleagues appreciated the recipe so much and you loved the dish so very much 🙂 Hope you love my other recipes as well. Take care Hailey. - Meghna