- Pinterest2.3K
- Subscribe
- Total2.3K
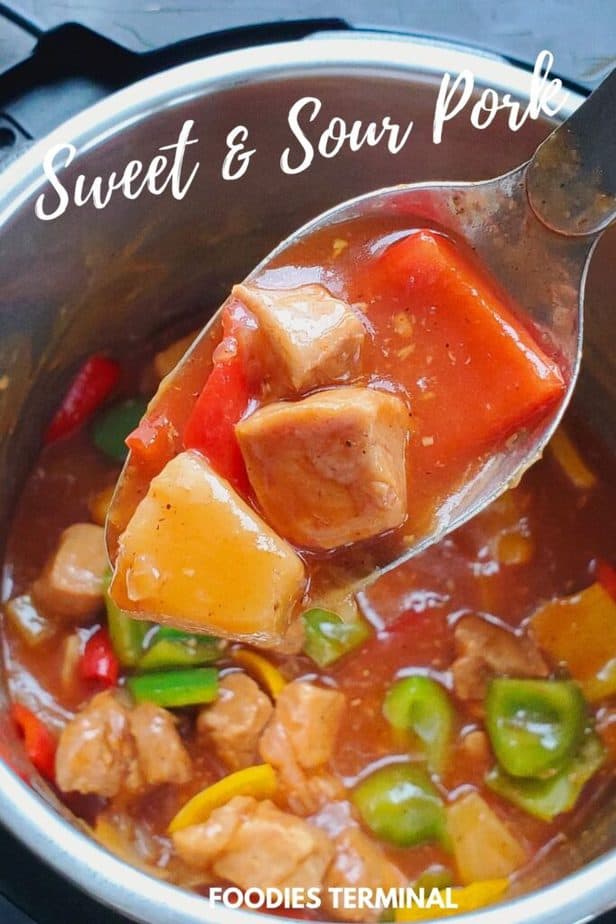
Instant Pot Sweet and Sour Pork is a 10 mins Dump & Start Instant Pot recipe with an incredible sauce. The chunks of pineapple & the crisp tender bell peppers takes the dish up to another level. Don't miss the Video.
Check out our library of easy Instant Pot Recipes & Asian Takeout recipes.

Sweet and Sour Pork with Pineapple
Instant Pot Sweet and Sour with pineapple will reward you with extremely juicy pork doused in a tangy & sweet addictive sauce and loaded with juicy pineapple chunks & crisp tender bell peppers!
You'll enjoy every bit of this dump & start instant pot recipe! It's an effortless recipe with magical flavors that even a beginner cook can make just like a pro.
Tips & Tricks
- Dumping trick: Add the ingredients in order and as mentioned in the recipe. It's very important to avoid the BURN error.
- No BURN ever: Add the brown sugar at the end and on top of all other ingredients. DO NOT stir the ingredients before pressure cooking. Brown sugar always tends to settle at the bottom of the pot and trigger BURN error. So, it's it's very important at the top of other ingredients.
- Crunchy bell peppers: If you prefer crunchy bell peppers add them after the pressure cooking cycle is over and you are done thickening the sauce. The residual heat trapped in the pot will do the magic and cook down the bell peppers just enough so that they retain there crunch. We love this hack!
- Tender well cooked bell peppers: If you are team tender bell peppers than do add them along with the onion and pressure cook them. They'll be well cooked, and very soft.
- Thickening sauce: We prefer cornstarch slurry as our gluten free thickener. It's equal amounts of cornstarch and water mixed together to form a slurry. The sauce in this recipe is not super sticky or thick. The ideal consistency would be a flowy sauce that would drip but thick enough to well coat each and every piece of pork very well. So, we did not add a lot of cornstarch.
Ingredients
Find the Ingredients with actual measurements at the bottom of the post. The list below is just a reference.
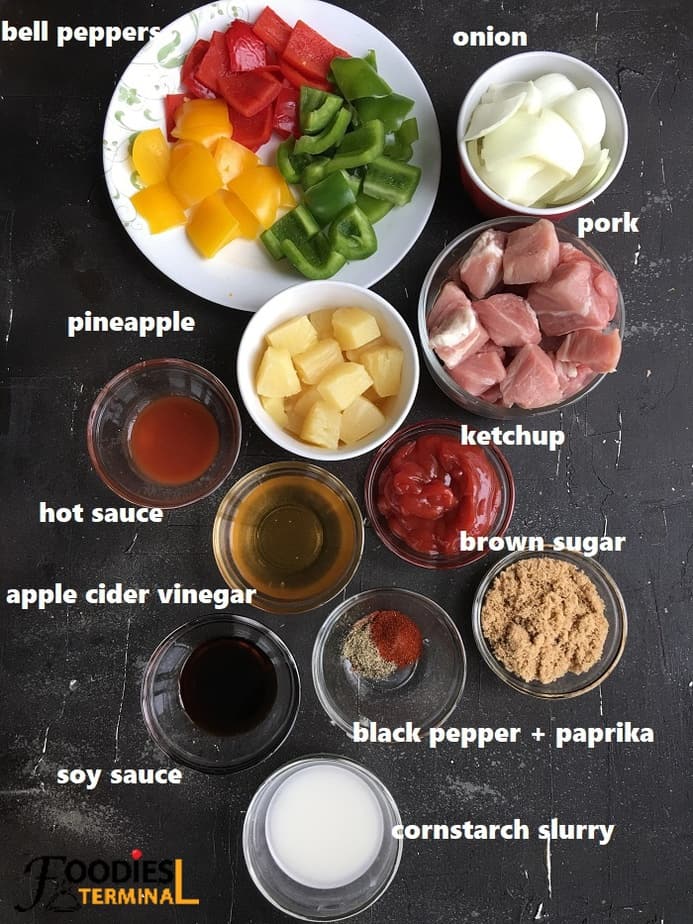
- Pork: The best cuts of pork that work well for today's recipe is boneless pork loin, pork butt, boneless pork chops. I would not recommend using pork belly due it's high fat content and slightly different texture. However, Pork belly would make an awesome Instant Pot Pork Adobo.
- Onion: For best flavor use yellow onion. Dice the onion into large squares and than separate the petals. Refer the above pic.
- Bell peppers: We love to use different colors. You can use whatever you have in your fridge or pick your favorite colors. I would insist on using the red bell pepper because it adds such a nice sweetness and aroma to the dish. Totally mellows down the tang and takes the dish to another level.
- Pineapple: You can use pineapple chunks from the can (drained) or use fresh diced pineapples. We chose to go with canned pineapple this time.
- For the sauce: Ketchup, apple cider vinegar, soy sauce, hot sauce (optional) and brown sugar. If you are heat intolerant skip adding the hot sauce. You can also sub the hot sauce with ½ tsp cayenne pepper.
- Thickener: Cornstarch slurry. Equal parts cornstarch & water mixed together to form a slurry. It's gluten free.
- Seasonings: Ground black pepper and paprika. The paprika would add a nice color to the dish. Do not add smoked paprika.
- Cooking oil: Any neutral oil. We use extra light olive oil. You can use avocado oil, canola oil, sunflower oil or vegetable oil.
Method
Find the detailed step by step recipe along with measurements + Video at the bottom of the post.
Step #1 Dump Ingredients & Pressure cook
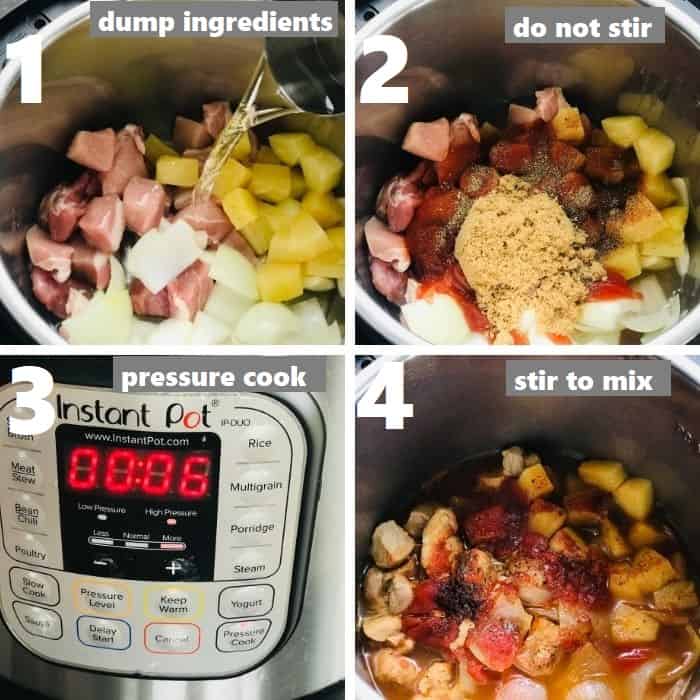
- Dump ingredients in order: Follow this order : Pork, onion and pineapple goes in first. Than, add the liquids like water, apple cider vinegar & soy sauce. Finally, add the ketchup, seasonings and at last add the brown sugar. DO NOT mix or stir. This is important to prevent BURN error!
- Pressure cook: Secure the lid and Pressure cook on high for 6 mins followed by 5 mins natural release. Give everything a good stir. You'll end up with a good amount of sauce.
Step #2 Thicken Sauce & Serve
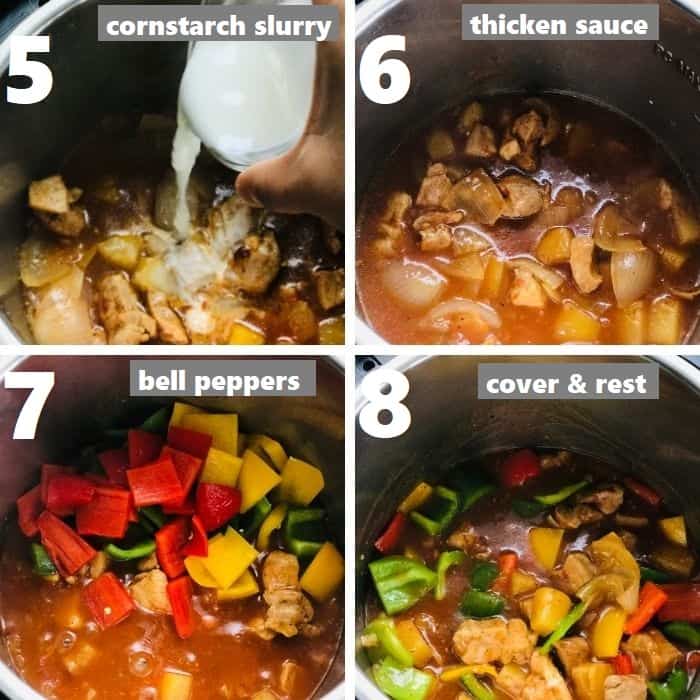
- Thicken Sauce: Now add the cornstarch slurry. Mix well. Simmer on SAUTE kept on LOW heat to thicken the sauce stirring from time to time. You can thicken the sauce to your desired consistency.
- Add Bell Peppers: Turn off the instant pot. Add the bell peppers, stir to mix. Cover and rest for 5-10 mins. The residual heat will cook down the bell peppers to crisp tender consistency.
- Serve: Serve the sweet and sour pork instant pot recipe with rice or noodles'. Enjoy!

Storing Tips
Fridge: The Instant pot sweet and sour pork will last for upto 5 days in the fridge. Store it in air tight containers for best flavor.
Can you freeze sweet and sour pork?
Yes, you can freeze sweet and sour pork for upto 3 months. Heavy duty freezer safe bags or containers works best to keep the flavors intact for that long. Thaw the dish over night in the fridge and than reheat following the directions below.
Can you reheat sweet and sour pork?
Yes, you can reheat sweet and sour pork in the microwave oven until warm or hot. You can also reheat the dish on the stove top using a skillet.
Sprinkle water on top of the sweet and sour pork with pineapple and than begin the re-heating process. This will add some extra moisture and help loosen the sauce a bit.
FAQs
Yes, sweet and sour pork is gluten free. Make sure to use gluten free sauces in the recipe.
No, sweet and sour pork doesn't have dairy.
Sweet and sour pork tastes sweet, tangy & slightly salt. The chunks of pineapple add a bit of tang and sweetness, whereas, the crisp tender bell peppers add a subtle crispness and whole lot of freshness to the dish.
Sweet and sour pork is a Chinese dish popular in westernized Cantonese cuisine.

Instant Pot Sweet and Sour Pork
Print Recipe Pin RateWatch Recipe Video
Ingredients
- 1 pound pork (**pork loin, butt or boneless pork chops diced into 1 inch cubes.)
- 1 cup onion (**yellow onion dice into large 1 inch chunks and petals separated. Refer video and ingredients photo.)
- 1 cup green bell pepper (**diced into 1 inch squares.)
- 1 cup red bell pepper (**diced into 1 inch squares.)
- 1 cup yellow bell pepper (**diced into 1 inch squares.)
- 1 cup pineapple (**chunks. Fresh or from the can drained.)
- ⅓ cup ketchup
- ⅓ cup brown sugar
- ¼ cup apple cider vinegar
- ⅓ cup water
- 1 tbsp hot sauce
- 1 tbsp Soy sauce (**use low sodium. You can also use coconut aminos.)
Seasoning
- ½ tsp Paprika (**don't use smoked paprika.)
- ½ tsp Ground Black Pepper
Thickener
- 2 tbsp Cornstarch (**mixed with 2 tbsp water to form a slurry.)
Equipment Used
Instructions
- Dump Ingredients in this order: Pork, onion, pineapple, water, vinegar, soy sauce, ketchup, hot sauce, seasonings, sugar. DO NOT stir or mix. This order is very important to avoid BURN.

- Pressure Cook: Secure the lid of the Instant Pot. Seal the valve and pressure cook on HIGH for 6 mins. When the pressure cooking cycle is over the instant pot will begin to beep, wait for 5 mins natural pressure release (NPR) and than release the rest of the pressure manually by moving the valve from the sealing to the venting position. Open the lid carefully. You'll be left with a lot of liquid.
- Thicken Sauce: Hit SAUTE function and set it on low. Give everything in the pot a good stir to mix the ingredients well. Now, add the cornstarch slurry and stir well to mix well. Simmer the sauce to thicken it stirring often. You can thicken the sauce to your desired consistency.
- Add Bell Peppers: Turn off the Instant Pot and add the bell peppers. Give everyhting a good stir until the bell peppers are well coated with the sauce. Cover and rest for 5-10 mins. The residual heat will cook down the bell peppers just enough to crisp tender consistency. Read NOTES below if you prefer well cooked softer bell peppers. Serve hot over rice and enjoy!


Notes
- Softer Bell Peppers: Add the bell peppers along with the onion and than pressure cook with everything else. You'll have well cooked very soft bell peppers instead of crisp tender bell peppers (today's recipe).
- Can I use fresh pineapple? Yes you can use fresh pineapple chunks instead of canned pineapple. The recipe would remain the same.
- Is the recipe spicy? No the Instant pot sweet and sour pork with pineapple is not spicy at all. The dash of hot sauce just helps balance the sweetness. It does not add any heat to the dish.


Michelle says
It came out delicious even though I messed up and added the peppers with the onions. Whoops that what happens when you don’t read the whole recipe lol Family says it’s a keeper! I’ll also be trying putting it the freezer like another commenter said, what a great idea!! Thanks for the dinner win!!!!
Foodies Terminal says
So glad you guys loved this recipe 🙂 Thanks so much for the amazing feedback, appreciate it. - Meghna.
Mindy Thomas says
I thought this was delicious. I used a tbsp. Of hot sauce like it is listed and had to cut the spice some with more vinegar and brown sugar. We really enjoyed this. Next time,I will just use a tsp of hot sauce.
Foodies Terminal says
Hey Mindy thanks so much for the amazing feedback, appreciate it. So glad you enjoyed this recipe. - Meghna.
CJ says
This is a really great recipe! I make it quite often as it is tastey & quick, sometimes adding thick slices of carrot after the onions or maybe mixing in bite sized brocolli florets with the peppers once the main cooking is done & I've added the cornstarch; it always turns out delish.
I've always thought it would be nice to have the ingredients list follow the order of adding the items into the pot. For instance, the sugar is added to the pot last, but it's listed halfway down the list of ingredients; this creates alot of flipping back & forth between the ingredients & the instructions for me. Just a thought. Everyone I've made this for loved it!
Foodies Terminal says
Thanks so much for the wonderful feedback CJ, appreciate it a lot 🙂 We love the the excellent idea of the ingredients list, thanks so much for sharing your idea with us 🙂 - Meghna.
Christie says
I added a little orange juice and it was great! Tender and juicy.
Foodies Terminal says
So glad you loved this recipe Christie 🙂 Thanks so much for sharing your wonderful feedback 🙂 Appreciate it! - Meghna.
Karen says
Hi, how long do I put the cook time if Im using frozen pork chops? I wont have time to thaw them 🙁 Thanks!
Foodies Terminal says
Cook thick frozen pork chops for 10 mins on high pressure followed by natural release. Cook thin cut frozen pork chops for 7 mins on high pressure followed by 10 mins natural release. Hope you enjoy this recipe. Thanks - Meghna.
Kathryn says
Fabulous. I, too, added a bit of chopped celery, a few shakes of ginger, and used pineapple juice to make the slurry.
Great recipe!! Thank you.
Foodies Terminal says
So glad you enjoyed this recipe Kathryn. Thanks so much for the feedback, appreciate it. - Meghna.
Karyn says
Easy and fast great tasting. The meat was really tender
Foodies Terminal says
So glad you loved the recipe Karyn 🙂 Thanks much for the wonderful feedback, appreciate it 🙂 Hope you'll try our other recipes from the blog and enjoy each one of them 🙂 - Meghna xoxo.
Mike says
Followed the recipe and can confirm that it didnt burn and was lovely 🙂 I tripled the amounts but left cook times the same. Still worked a treat. Finally as i cant eat bell peppers we added so mini corn right at the end - serious lovely.
Foodies Terminal says
Hey Mike so glad you enjoyed this recipe 🙂 Our recipes when followed to the T never triggers a burn as it's tested a multiple times in our test kitchen 🙂 Mini corns are delicious additions! Hope you give our other recipes a try as well. Have a nice day Mike! - Meghna xoxo.
Christy Willis says
Super easy and absolutely delicious! Will make again!
Foodies Terminal says
So glad you loved the recipe Christy 🙂 Thanks so much for the lovely feedback, appreciate it! - Meghna xoxo
Karen says
Great recipe! Made it tonight for dinner. I did add a bit of grated ginger. Served it over rice done in the Instant Pot. Thanks for the recipe.
Erin says
This was ABSOLUTELY delish! 🙂 I changed the amount of servings to 6 people and followed the recipe. Super easy to follow. I might add a little more hot sauce for a bit more kick, but other than that, it was great!
Foodies Terminal says
So glad you enjoyed the recipe Erin 🙂 - Meghna xoxo