- Pinterest332
- Subscribe
- Total335
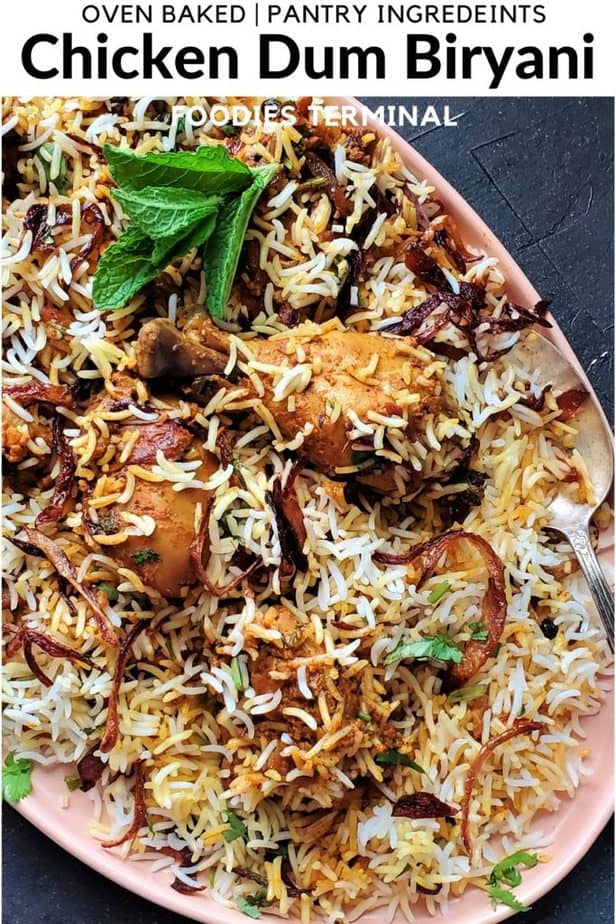
Learn How to make Chicken Dum Biryani in Oven with amazing results every single time. This post will show how to make a perfect easy Indian Chicken Biryani with readily available ingredients from your pantry. Don't miss the Tips & the video.
**This Post has been updated with better content, better pictures, step by step tutorial, Tips & Tricks & a Recipe Video to help the readers.
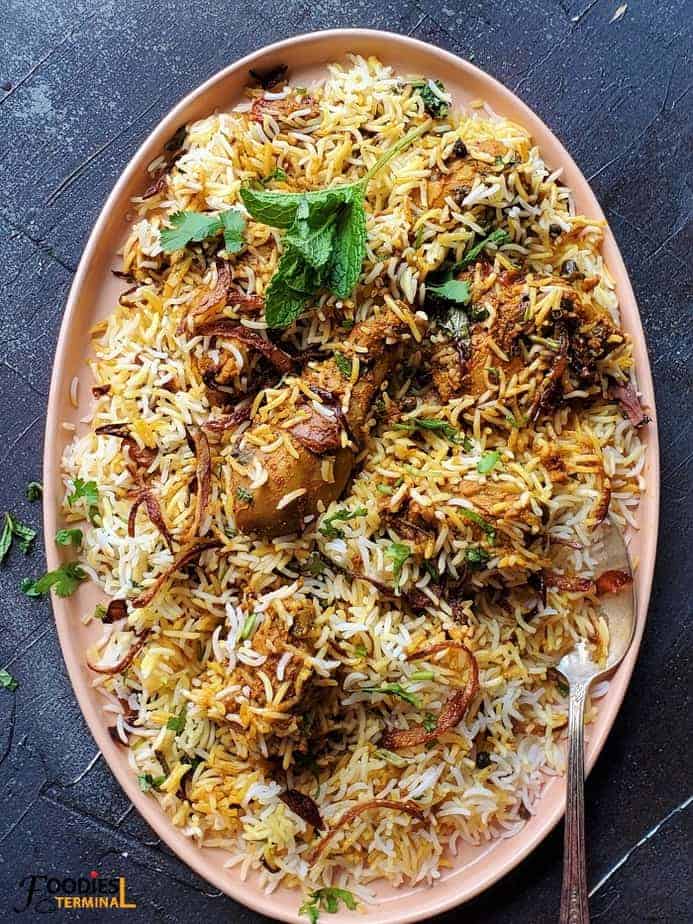
Indian Chicken Biryani Recipe
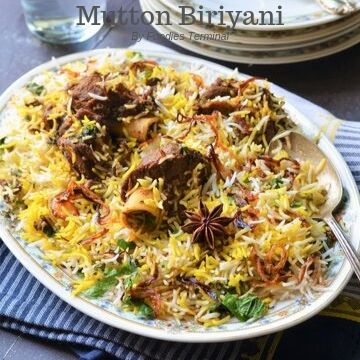
Today's Chicken Dum Biryani in Oven is as easy as this Easy Mutton Biryani Recipe.
You'll have perfectly cooked Basmati Rice layered and oven baked with a delicious chicken gravy that's made quickly in an Instant Pot (electric pressure cooker). Oven cooked Biryanis are perfect especially when you are looking to re-create Dum style Biryani at home.
I'll highly recommend that you use my homemade Biryani Masala Powder to make this Chicken Biryani, you'll get fabulous results every single time.
Ingredients
Find the Ingredients with actual measurements way below the post on the "Recipe Card". The list below is just a reference.
For the Chicken Marinade:
- Chicken: On the bones and skinless. If you prefer boneless chicken use either thigh meat or breasts.
- Yogurt: You can use fat free or full fat yogurt. You may use thick yogurt but it's not mandatory.
- Homemade Biryani Masala powder: Check out our Biryani Masala Powder Recipe. You'll love it. The Best Biryani masala ever that never disappoints anyone 🙂 Try it once!
- Ginger Garlic paste: Try our Homemade Ginger Garlic Paste Recipe. This paste will last you the longest without turning green. Tons of tips shared in the post. Don't miss it!
- Spice Powders (Masala powders): Turmeric powder, Coriander powder, Cumin Powder, Kashmiri Red Chili Powder or Paprika Powder, Red Chili Powder.
- Whole Spices: Black Peppercorns, Mace, star anise, Cloves, green cardamoms, Cinnamon stick, Black cardamoms.
- Whole dry red chilies.
- Crushed Tomatoes: I used store bought canned crushed tomatoes. You can use any brand.
- Mustard Oil: This is a must and makes an absolute delicious Biryani. The pungency of mustard oil adds a huge depth of flavor.
- Herbs: Fresh chopped Mint and Cilantro.
- Birista: Deep fried onions. You can easily sub this one with store bought deep fried onions.
For the Basmati rice:
- Aged Basmati rice: Aged Rice will give you the best results. They have lesser starch content and hence makes an absolutely light & fluffy Biryani.
- Shahi Jeera.
- Black Peppercorns.
- Cloves.
- Ghee: Try our fabulous & fragrant homemade Instant Pot Ghee recipe.
- Salt.
For assembling the Chicken Dum Biryani:
- Saffron soaked in milk.
- Ghee: Try our homemade ghee recipe that's made from unsalted butter. You be pleased with the results every single time.
- Herbs: Freshly chopped mint & cilantro.
- Birista.
Tips & Tricks
- Aged Basmati Rice: Whenever I make Biryani I always choose an aged Basmati Rice. Less starch, fragrant and results in a fluffy, light perfectly cooked Biryani every single time.
- Rinse the rice several times: This is very important. Rinse the rice several times under running tap water and stop when the water is no more cloudy. This helps to rinse out the surface starch from the rice & as a result makes a super fluffy Biryani.
- Cook the rice 90%: Otherwise you'll end up with over cooked very soft rice. Over cooked rice is a disaster for Biryani recipes. You've to start all over again.
- Chicken Gravy: A delicious pot of chicken gravy will make an outstanding biryani. Make a quick aromatic chicken gravy first. I used my Instant Pot but you can use a regular pressure cooker or make it on the stove top in an open pot.
- Don't skip the ghee & the saffron milk: They add huge depth of flavor.
- Gather all ingredients before beginning the recipe.
- Do not skip the Birista: You may also add store bought deep fried onion. They make the Biriyani very flavorful.
Method
**Steps in words below pictures.
Find the detailed step by step recipe along with measurements way below the post on the "Recipe Card".
Step #1 Marinate Chicken

Add all the marinade ingredients like yogurt, mustard oil, salt, dry spice powders, briyani masala powder, chopped herbs, birista, ginger garlic paste, dry whole red chilies into a bowl.
Throw in the chicken pieces and massage the chicken pieces very well with the ingredients.
Cover the bowl and allow the chicken pieces to rest in the marinade overnight in the fridge or for at least 2 hours.
Step #2 Cook the Chicken Gravy
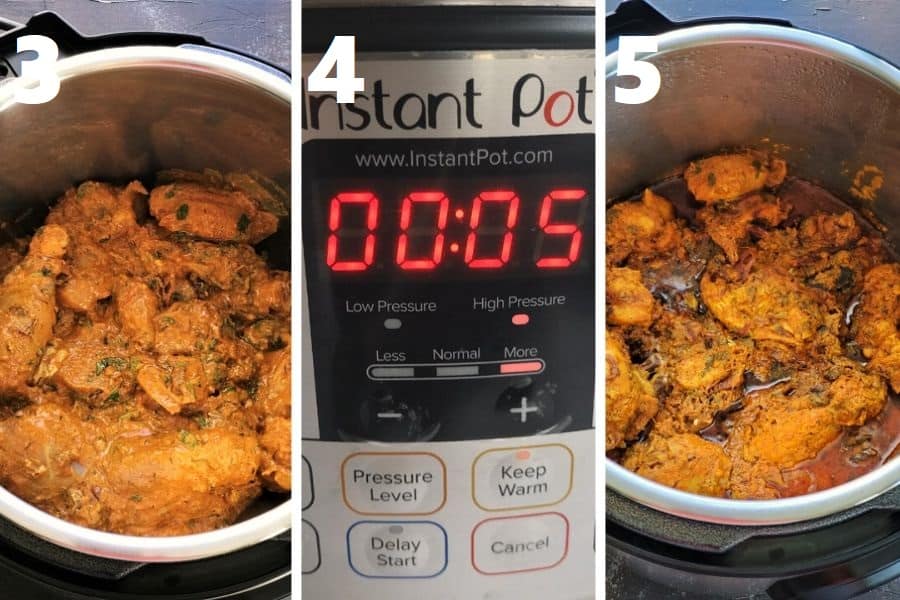
Dump the chicken along with the marinade into the steel insert of the Instant Pot.
Cover the lid, seal the valve and PRESSURE COOK on HIGH for just 5 minutes followed by 5 minutes NPR (natural pressure release).
Sometimes the yogurt and the chicken releases lots of juices and you are left with excess liquid.
In that case, CANCEL the pressure cook function and press the SAUTE function in the Instant Pot and set i on LOW.
Simmer the gravy until it thickens a bit or stop when you love the consistency.
You must have enough thick gravy but not too runny.
Step #3 Cook the Basmati Rice
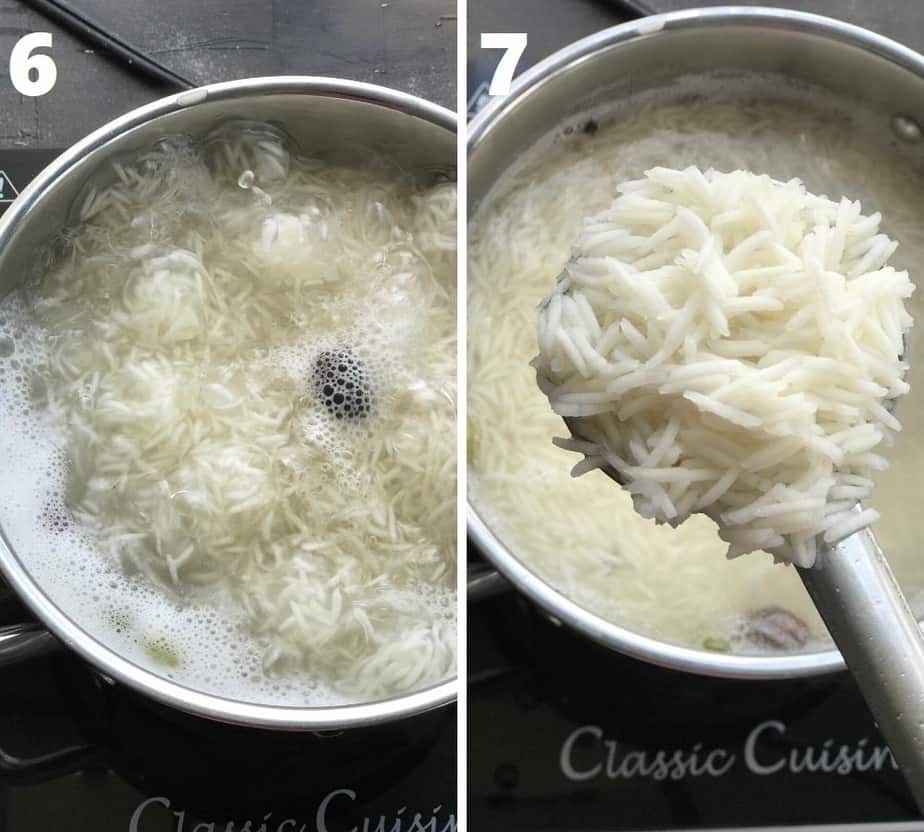
Rinse the basmati rice several times under running tap water until you have clear water left (no more cloudy water).
Bring enough water to a rolling boil in a pot on the stove top. Add all the dry whole spices, ghee and salt in the boiling water.
Add the rinsed rice and cook until just 90% done.
You need to watch the rice like a hawk. This is the most critical step of a good Biryani & it's quiet easy to over cook the rice.
Don't leave the side of the pot and drain the rice immediately when it's 90% done. The rice grains will remain al dente but break easily at this stage.
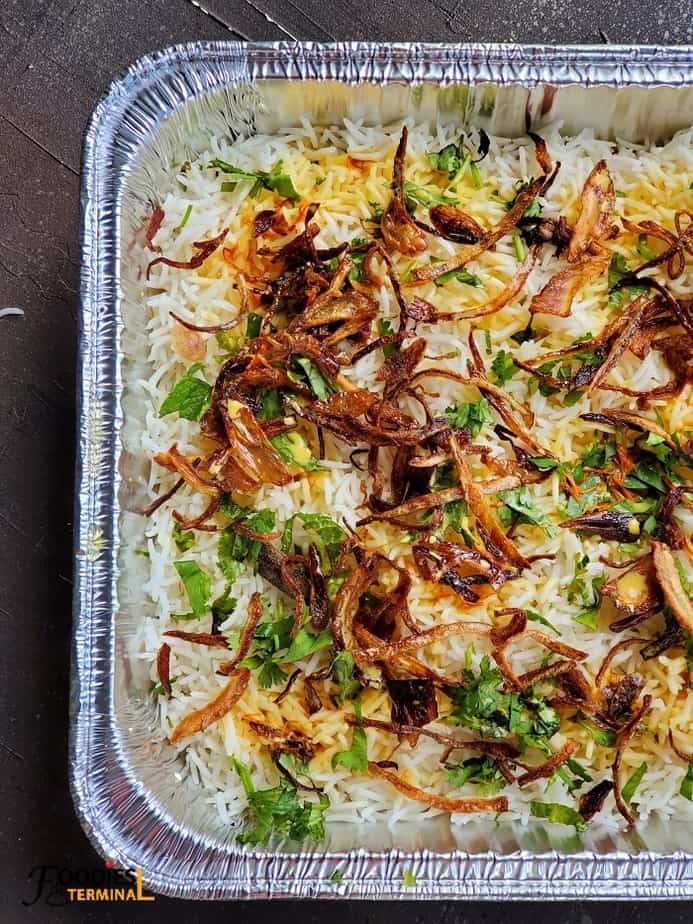
Step #4 Assemble Biryani

It's time to layer the Biryani.
In an oven safe Biryani pot or in an aluminum tray layer the chicken gravy. Sprinkle birista, chopped herbs and than layer the cooked basmati rice.
Top it again with Birista, chopped herbs, saffron soaked milk and ghee.
Cover the pot with it's lid or the aluminum tray with an aluminum foil tightly. The trays are ready to go in the oven.
Step #5 Oven-Bake Chicken Dum Biryani
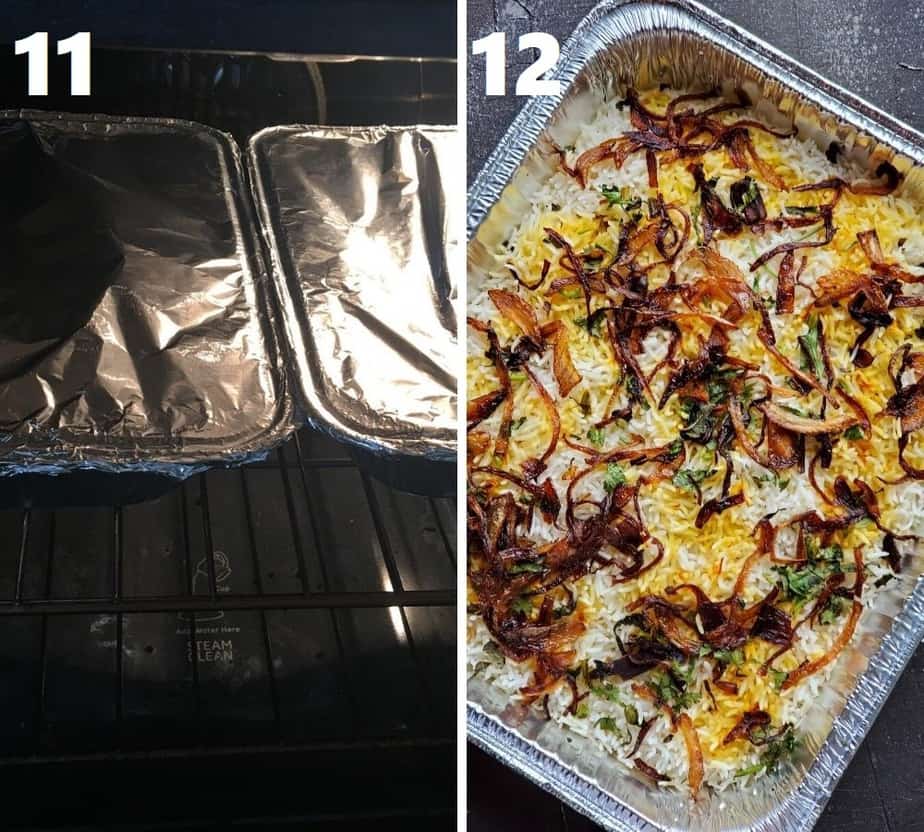
Pre-heat the oven to 350 degree Fahrenheit or 175 degrees Celsius and cook the Chicken Dum Biryani in the middle rack for 30-35 minutes.
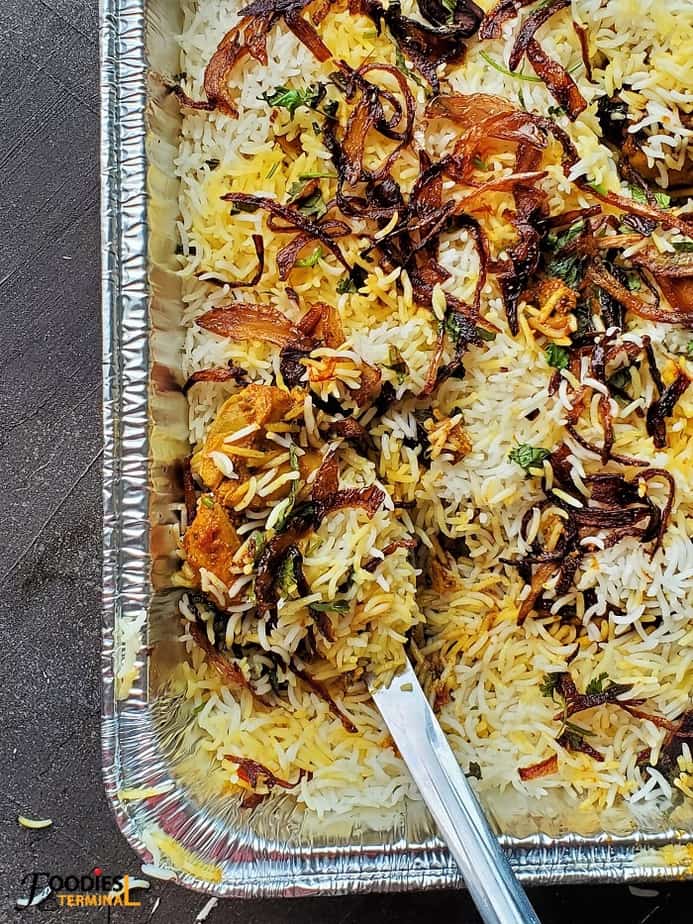
Enjoy with homemade raita!
Storing Tips
Fridge: This Chicken Dum Biryani lasts for 5 days in the fridge when stored in moisture free air tight containers.
Freezer: You can freeze the oven baked chicken Biryani for 3 months in the freezer safe bags or containers.
Serving Ideas
We love to enjoy any this easy Indian Chicken Dum Biryani as such. It's make a wholesome, feeling and a delicious meal anytime.
You can also serve it with raita or just sliced onions.
More Rice Recipes from us


How to make Chicken Dum Biryani in Oven
Print Recipe Pin RateWatch Recipe Video
Ingredients
For marinating the Chicken
- 2.20 pounds skinless chicken on the bones (1 kg)
- ¾ cup yogurt (you may use thick yogurt but it's not mandatory)
- ½ cup crushed tomato
- 1.5 tbsp Ginger Garlic Paste
- ¼ cup Extra Virgin Mustard Oil
- ½ cup Birista (or store bought deep fried onion)
- 1 tbsp Biryani Masala Powder
- 1 tbsp Turmeric Powder
- 1 tbsp Coriander Powder
- 1 tbsp Cumin Powder
- 1 tsp Paprika or Deggi Mirch or Kashmiri Red Chili Powder (or Paprika Powder)
- ½ tsp Red Chili Powder
- ½ tsp Black Peppercorns
- 5 Cloves
- 4 Green Cardamoms
- 2 Black Cardamoms
- 2 Star Anise
- 1 Mace
- ½ inch Cinnamon Stick
- ½ tsp Shahi Jeera
- 3 whole dry red chilies
- ¼ cup chopped cilantro
- ¼ cup chopped mint leaves
- Salt (to taste)
For the Basmati Rice
- 3 cups Basmati Rice (aged variety)
- ½ tbsp ghee
- 10 Black Peppercorns
- ½ inch Mace
- 2 Green Cardamoms
- 2 Black Cardamoms
- 4 cloves
- ½ inch cinnamon stick
- Salt (to taste)
For assembling the Chicken Dum Biryani
- ½ cup Birista
- 1 tsp saffron soaked in ½ cup warm milk
- 2 tbsp chopped cilantro
- 2 tbsp chopped mint
- 4 tbsp Ghee
Equipment Used
Instructions
Marinating the chicken
- Add all the ingredients in a big bowl mentioned on the "For Marinating the chicken" section above. Mix everything together so all the chicken pieces are well coated with the marinade.
- Cover the bowl with a plastic cling wrap or a plate and store it in the fridge over night for best results. If you are pressed for time allow the chicken to rest in the marinade for atleast 2 hours.
Cooking the chicken gravy
- Add the marinated chicken along with the marinade into the steel insert of the Instant Pot. Close the lid, seal the valve. And PRESSURE COOK on HIGH for just 5 minutes.
- Once, the cooking cycle is over you'll notice that the Instant Pot will begin to beep. Wait for NATURAL PRESSURE RELEASE (NPR) for 5 minutes and than release the rest of the pressure manually by moving the valve from the SEALING to the VENTING position. (**Read NOTES below to get the stove top & regular pressure cooker chicken gravy cooking instructions).
- If you are left with lots of gravy sauce than turn the SAUTE function of the Instant pot and simmer the gravy until it thickens a bit. The gravy should not be runny or soupy. But there should be enough gravy left to layer the Biryani.
Cooking the Basmati Rice
- Rinse the Basmati rice very well several times under running tap water until clear water runs through.
- Bring enough water to a rolling boil on the stove top. Also, add all the dry whole spices mentioned above in the "For the Basmati Rice" section.
- Cook the rice on medium heat until it's 90 % done.
- Drain the rice immediately.
Assembling the Chicken Dum Biryani
- Layer the chicken gravy on an aluminum tray deep enough (refer the photos & the Video). Sprinkle Birista, chopped cilantro + mint & drizzle ghee.
- Now, layer the cooked basmati rice over the chicken gravy in an even layer.
- Sprinkle Birista, chopped cilantro + mint, drizzle ghee and the soaked saffron milk. The Chicken Dum Biryani is ready to go inside the Oven.
- Wrap the tray tightly with aluminum foil.
Making the Chicken Dum Biryani in Oven
- Pre-heat the Oven at 350 F or 175 C.
- Place the aluminum tray containing the assembled Biryani in the middle rack and bale for 30-35 minutes.
- Enjoy with some raita or some crunchy sliced onions.
Notes
- Measuring Units Used, 1 Cup = 240 ml & 1 teaspoon = 5 ml.
- Cooking the Chicken gravy on stove top: Cover and cook the chicken gravy on the stove-top in a pot or a kadai over medium low heat until it's fully cooked. Approximately 20 mins.
- Regular Pressure Cooker Chicken Gravy: Cook it in a regular pressure cooker over medium heat for 4-5 whistles. Natural Release the Pressure.
- How to make Birista: Slice onions thinely and deep fry them in hot oil until golden.
- Store bought Fried Onion: These are a quick alternative to Birista and work just as good in a recipe. You can definitely use them.


Nuzhat zafar says
Precise measurements, which is most important
I live in London and my therapy is cooking to entertain my friends and family .. I am 83 old lady originally from India but now 2 generation settled in Uk.. Indian cuisine is very popular and Biryani is well known.. I saw your recipe first time as I was searching what temperature to Dum Biryani in oven and your recipe popped up.. very happy to see and share .. you are doing awesome 👏 job.. keep it up 👍🏼
Foodies Terminal says
Thanks so much for the amazing feedback Nuzhat 🙂 Appreciate it. So glad you love this recipe so much 🙂 - Meghna.
Luther Zimmerman says
is is good for health
Foodies Terminal says
Depends on your diet restrictions which is completely unknown to me. For a person without any diet restrictions this recipe is healthy and filling. Let me know if you have any other questions regarding this recipe. Thanks so much for stopping by 🙂 - Meghna.
ramesh says
Thanks For Sharing this amazing recipe. My family loved it. I will be sharing this recipe with my friends. Hope the will like it.
Foodies Terminal says
So glad you enjoyed the recipe Ramesh 🙂 Thank you for the amazing feedback 🙂 - Meghna
Shan says
The thick curd really helps. Thanks for this yummy yet easy recipe.
Foodies Terminal says
So glad you love the recipe so much Shan 🙂 Thanks for taking your time to leave such a wonderful feedback, totally appreciate it 🙂 - Meghna